How to Virtualize Mac OS X using ESXi 5.1
 Simon Eady
As a proof of concept I recently tried to virtualize OS X (Mountain Lion) - It is important to note that VMware is now licensed to do so and you can read more here.
The following is an overview of the steps I followed to achieve my goal in some cases it was trial an error as I am not a regular Mac user.
The Hardware
As OS X requires Apple hardware to run you will have to find yourself a Mac that will install and run ESXi. You can check VMware’s HCL even though the results only listed MacPro5,1 I was able to run ESXi 5.1 on a MacPro4,1. I did try it on an earlier MacPro but no joy. For this proof of concept test i have the following hardware.
- 2x 4core MacPro4,1
- 7GB Ram
- Single 1TB SATA Drive
I am also aware others have used Mac mini’s as Lab machines but I will not cover that here.
ESXi installation
The installation is simple, by burning an ISO with ESXi 5.1 and booting the MacPro from the CD and then follow the usual steps to deploy ESXi.
Note - if you find nothing happens and you end up with a black screen with “Select CD-ROM boot type” its likely your MacPro cannot run ESXi though I have read a few article where individuals have performed firmware updates etc.
Once you have have ESXi installed configure it in what ever fashion you wish (a static IP is never a bad idea)
OSX install & media
Before you go about deploying the VM you will need the OSX install media, after a good deal of searching for the “best” way to deployed OSX I found a great little article that creates a bootable USB memory stick. This worked for me first time and continues to work with no issues.
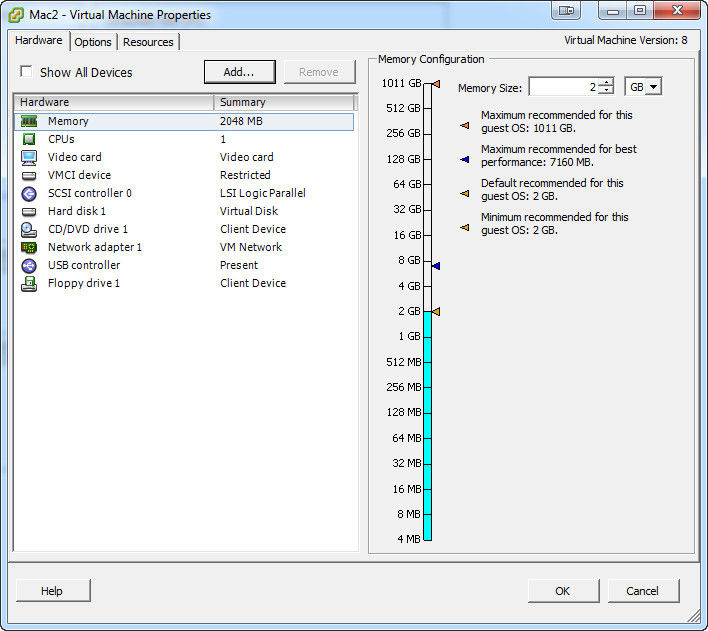
Once you connect to your ESXi host with your vSphere client you will need to create your new OSX VM this process is the same as creating any other VM but ensure you select the following from the wizard

Once your VM has been created you will need to select the bootable USB memory stick you created earlier, right click on your VM and select “edit settings” then click add at the top of the newly opened window as seen below.
Select “USB Device” and click next then select your bootable memory stick
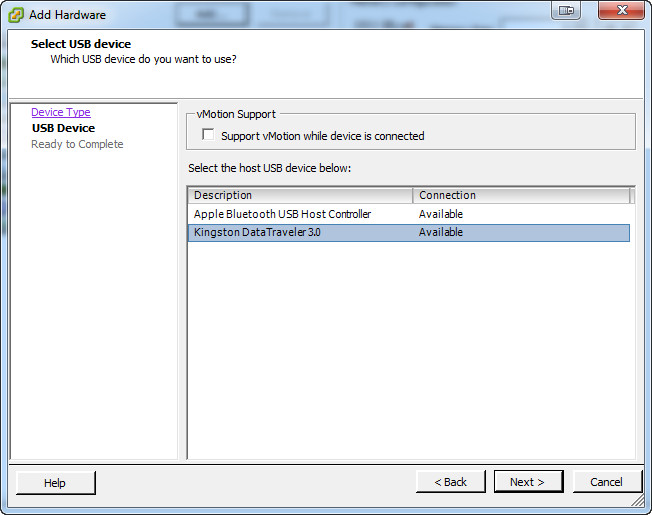
The click “next” then click “finish” and then click “ok”
Now right click on the VM and select “open console” once its open click the green “power on button”
At this point the VM should boot from the USB stick, however if after sometime you are presented with the following command prompt don’t panic.
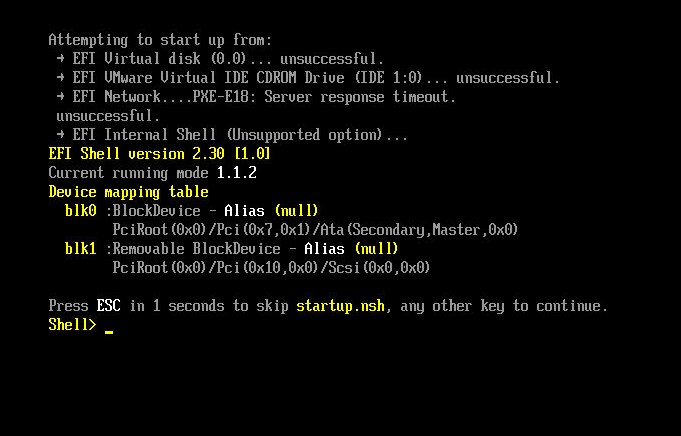
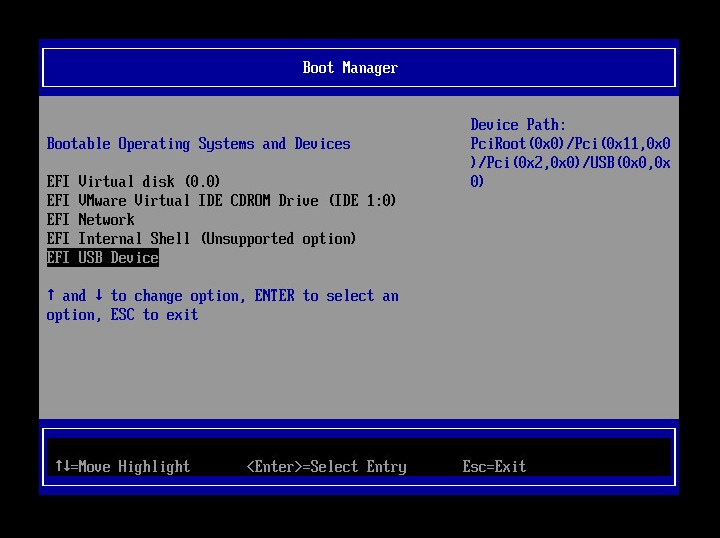
Type exit, select “boot manager” from the menu as shown below
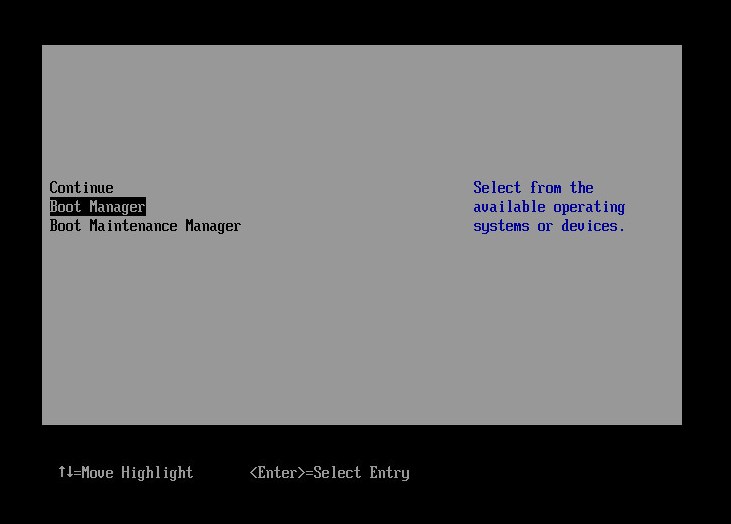
and then select “EFI USB Device” as shown below.
The VM should now boot from the USB memory stick and you can then follow the OSX install instructions as you see fit.
Once install you should then have OSX in all its “glory” ready to us in your console window. (don’t forget to install the VM tools)

I hope you found the article useful.