Configuring a remote access SSL VPN with VMware NSX
 Sam McGeown
 The NSX Edge Gateway comes pre-armed with the ability to provide an SSL VPN for remote access into your network. This isn’t a new feature (SSL VPN was available in vCloud Networking and Security), but it’s worth a run through. I’m configuring remote access to my Lab, since it’s often useful to access it when on a client site, but traditional VPN connections are often blocked on corporate networks where HTTPS isn’t.
Optional - configure a new IP address to listen for SSL VPN connections
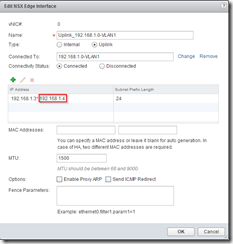
Rather than using your primary address for the Edge Gateway to listen on, you can add a new uplink interface (perhaps in an existing DMZ), or just an additional IP address to the existing uplink. Here I’ve added an extra IP address on the primary uplink so that I can keep it separate.
NSX > NSX Edges > Double click the edge you want to configure > Manage > Settings > Interfaces > Edit the Uplink
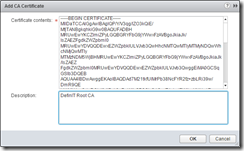
Optional - install a CA signed certificate for the SSL VPN
NSX > NSX Edges > Double click the edge you want to configure > Manage > Settings > Certificates
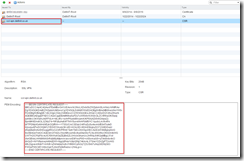
Click + and select “Add CA Certificate”, then paste in the contents of your CA certificate:
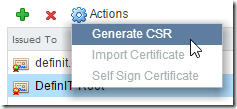
Select the newly installed CA certificate and click on the Actions menu, then Generate CSR
Fill out the CSR details as required:

Select the newly created CSR and copy the encoded request:
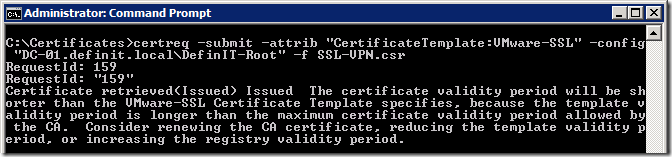
Submit the request to your CA - for my Microsoft Certificate Services CA I save it to a file called SSL-VPN.csr and submit it using certreq.exe:
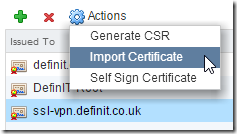
Once you’ve got the certificate, go back to the certificates page and select the CSR you generated, then click Actions and Import Certificate.
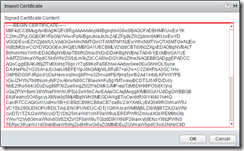
Copy the contents of the signed certificate and click OK to import:
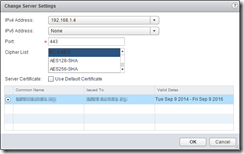
Configure the SSL VPN Server Settings
NSX > NSX Edges > Double click the edge you want to configure > Manage > SSL VPN-Plus > Server Settings
Configure the IP address and port to listen on, the Cipher and then select the certificate to use:
Create an IP Pool
An IP pool is simply a pool of IP addresses you want to allocate to the clients that connect to the SSL VPN. Specify a range that you can allocate that is large enough for your total concurrent VPN users.
Bear in mind this should be a new network that the Edge can use to identify your SSL VPN clients. Ultimately, I want my SSL VPN to access my management subnet (192.168.1.0/24) - if I create a pool of IPs in that subnet then I will likely cause routing issues which render the SSL VPN useless. When you create a new IP pool, create an entirely new subnet for it - the vmnic0 interface of the Edge appliance will be configured with an new IP in that subnet (you specify that in the Gateway field).
Since I’m only expecting 1 or 2 concurrent users, I’ll allocate 10 IPs:
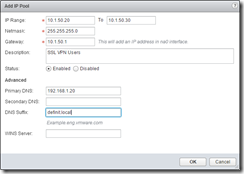
Later, when we activate the SSL VPN configuration, the gateway IP address will be visible under the Interfaces configuration of the Edge.
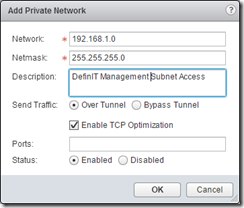
Configure Private Networks
Private networks are the networks that you want the SSL VPN clients to be able to access - not the most intuitive name!
The “Send Traffic” option basically specifies whether SSL VPN client traffic is routed through the Edge gateway, or is sent directly to the destination on the private network. If you send it over the tunnel, it’s strongly advised to enable TCP optimization:
Conventional full-access SSL VPNs tunnel sends TCP/IP data in a second TCP/IP stack for encryption over the internet. This results in application layer data being encapsulated twice in two separate TCP streams. When packet loss occurs (which happens even under optimal internet conditions), a performance degradation effect called TCP-over-TCP meltdown occurs. In essence, two TCP instruments are correcting a single packet of IP data, undermining network throughput and causing connection timeouts. TCP Optimization eliminates this TCP-over-TCP problem, ensuring optimal performance.
Finally, you can restrict the SSL VPN client’s traffic by specifying allowed ports (e.g 3389 for RDP, or 9443 for vSphere Web Client). If you do not specify any ports then access is unrestricted.
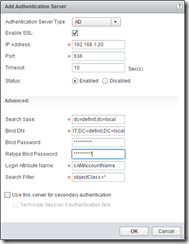
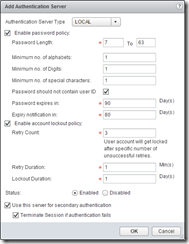
Configure Authentication
Configure an authentication source for SSL VPN users - there are plenty of options, but I’m going for AD authentication with a local authentication failback in case my DC is down for whatever reason.
The AD setup requires a user that can bind to the AD and a search base. These should be as restrictive as you can make them!
Notice the local authentication is second in the list, and the secondary authentication is ticked, as well as the terminate session if it fails.
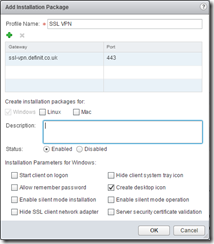
Create an Installation Package
Create an SSL client installation package - this is pretty self explanatory - SSL VPN clients need to install a package to then connect to the VPN - this is where you configure it!
Note that the Gateway is the address that the client will attempt to connect to when installed - I’ve entered my external address that will be NAT’d through to the Edge’s IP address for the VPN server.
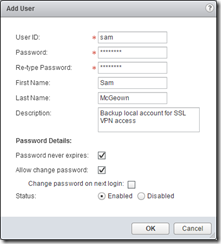
Create local users
If you’re just using local users, or you’ve specified local users as a backup for AD or another authentication method then you can add a user:
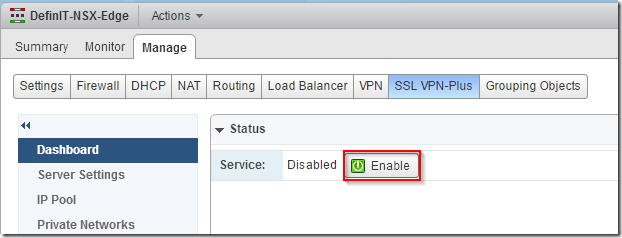
Enable the SSL VPN
There are a few other configuration options to go into, but for now we’ve done enough to enable and test the VPN.
Go back up to the dashboard tab and click enable:
Modify the firewall
In order for your SSL VPN client’s traffic to reach other networks behind the Edge, you’ll need to create an allow rule (unless you’ve changed the default rule to allow). I’ve just allowed my client IP Pool specified earlier to access any network - this doesn’t over-rule the Private Networks setting defined earlier.

Testing the SSL VPN
To test your new SSL VPN you either need to be outside of your network, or you could add a hosts file entry to point the gateway URL to the IP of your edge gateway - in my case I added “192.168.1.4 ssl-vpn.definit.co.uk” to my hosts file.
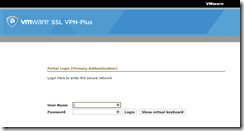
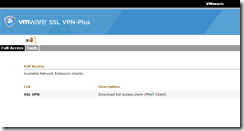
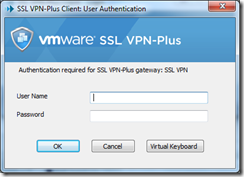
First log onto the SSL VPN site, then click the link to download the client we created earlier (I had issues here with Chrome - Firefox worked OK).
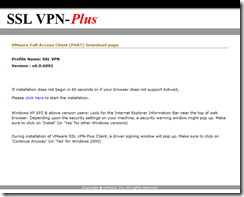
Run the installer when prompted (by this uuuugly page…)
The client should then run, pre-configured to connect to your SSL VPN
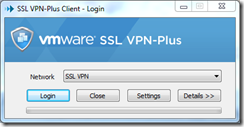
Enter your login credentials and connect:
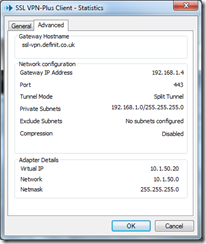
You can view details of your connection from the client icon in the system tray. Here you can see that I am connected to my gateway ssl-vpn.definit.co.uk (which has resolved to 192.168.1.4 thanks to my hosts file), that my tunnel mode is split (meaning I am only routing the Private Subnets over the VPN connection). We can also see that my Virtual IP on the VPN is the first one from the range I specified, 10.1.50.20.