vCAC 6.0/6.1 build out to distributed model: Deploy the Identity Appliance
 Sam McGeown
- Deploying fully distributed vRealize Automation instance – Configuring NetScaler Monitors
- Deploying fully distributed vRealize Automation IaaS components – Part 2: Database, Web and Manager services
- Deploying fully distributed vRealize Automation IaaS components – Part 1: Pre-requisites
- Deploying vRealize Automation 6.2 Appliance Cluster with Postgres Replication
- vSphere 6 HA SSO (PSC) with NetScaler VPX Load Balancer for vRealize Automation
- vCAC 6.0/6.1 build out to distributed model: Deploy the Identity Appliance
SSO is a fundamental requirement when deploying vCAC, whether for a distributed or simple installation. This walk through goes through the deployment and configuration of the vCAC Identity Appliance, which provides a stand alone SSO instance for vCAC.
Some of the posts in this series are completed with vCAC 6.0.1, others will be with 6.1. Where there are differences I will aim to point them out!
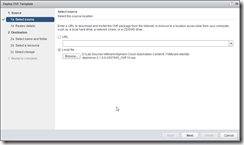
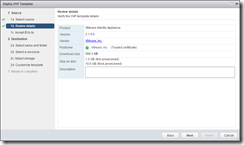
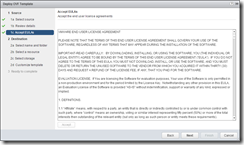
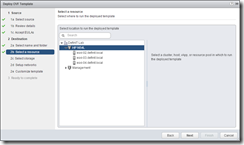
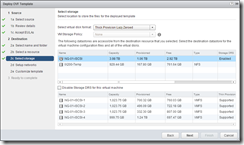
Deploying the OVF
Deploying the OVF is very simple, just run through the wizard:
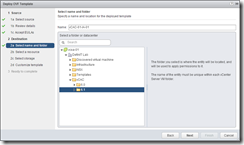
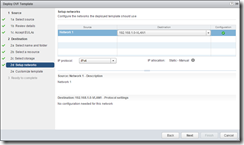
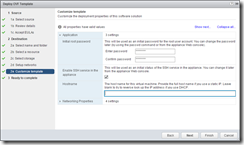
The appliance will perform a reverse lookup to get it’s hostname - if you have pre-staged a DNS A and PTR record, and have a reservation set for the VM. If you statically assign an IP address, make sure you use the FQDN in the hostname field - not doing so will cause issues with the self-signed certificates and also when you join the Active Directory domain.
Initial Appliance Configuration
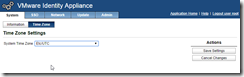
Log on to your new appliance using https://
Set the time zone - ensure this is consistent across all components of vCAC.
Configure your time source - again make sure it’s consistent throughout your vCAC deployment.
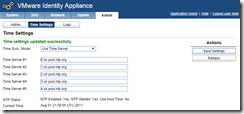
If the time doesn’t update, force a re-sync with “rcntp ntptimeset” via SSH.

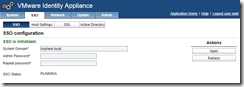
Configuring SSO
Initialise the SSO by entering an SSO admin password - this might take a few minutes to configure while it initialises
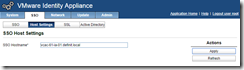
Modify the host settings and ensure you have the FQDN for the appliance (the domain should match the AD you want to join)
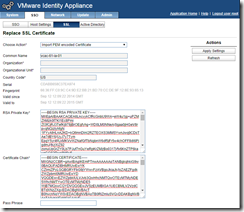
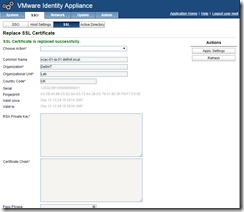
Generate (non-production or proof of concept) or import a certificate:
Create a config file:
[ req ]
     default_md = sha512
     default_bits = 2048
     default_keyfile = vcac-61-ia-01.key
     distinguished_name = req_distinguished_name
     encrypt_key = no
     prompt = no
     string_mask = nombstr
     req_extensions = v3_req
[ v3_req ]
     basicConstraints = CA:FALSE
     keyUsage = digitalSignature, keyEncipherment, dataEncipherment
     extendedKeyUsage = serverAuth, clientAuth
     subjectAltName = DNS:vcac-61-ia-01, DNS:vcac-61-ia-01.definit.local , DNS:192.168.10.20, IP:192.168.10.20

[ req_distinguished_name ]
     countryName = UK
     stateOrProvinceName = West Sussex
     localityName = Horsham
     0.organizationName = DefinIT
     organizationalUnitName = Lab
     commonName = vcac-61-ia-01.definit.local
Submit the config file to OpenSSL to create a private key file, and a certificate signing request:
openssl req -new -nodes -out vcac-61-ia-01.csr -keyout vcac-61-ia-01.key -config vcac-61-ia-01.cfg
Submit the CSR to your Certificate Authority (using the VMware-SSL template):
certreq -submit -attrib "CertificateTemplate:VMware-SSL" -config "DC-01.definit.local\DefinIT-Root" -f vcac-61-ia-01.csr vcac-61-ia-01.cer
Open the private key file (.key) and copy the contents - paste it into the private key field in the SSL certificate page of the Identity Appliance.
Next copy the contents of the signed certificate (.cer) to the Certificate chain field. Then copy any intermediate CA certificate contents, then the root CA certificate contents.
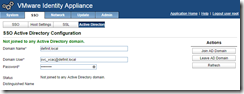
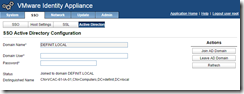
Join the Active Directory domain
Enter the domain’s FQDN, a user account with permissions to join the appliance to active directory and the password, and then click “Join Domain” - if your appliance hostname is not an FQDN or doesn’t match the domain that you’re joining, the operation will fail.