vRealize Automation 7 Custom Hostname with Event Broker (EB) Subscription
 Sam McGeown
![]() The new Event Broker service in vRA7 is one of the most exciting features of this latest release, the possibilities for extensibility are huge. At this point it time you can still use the old method of using workflow stubs to customise machine lifecycle events, but at some point in the future this will be deprecated and the Event Broker will be the only way to extend.
The new Event Broker service in vRA7 is one of the most exciting features of this latest release, the possibilities for extensibility are huge. At this point it time you can still use the old method of using workflow stubs to customise machine lifecycle events, but at some point in the future this will be deprecated and the Event Broker will be the only way to extend.
With this in mind, I wanted to use the Event Broker to do something that I am asked on almost every customer engagement - custom hostnames beyond what the Machine Prefixes mechanism can do.
This, as it turns out, Event Broker extensibility is not the simplest to get your head around - there is a very large (>100 page) extensibility document to parse!
For the purposes of this post, I will be using the BuildingMachine lifecycle state. This is because I want to modify the hostname before the VM is built - in much the same way as you would with the old ExternalWFStubs.BuildingMachine method.
One of the key differences between using the old WFStubs method and the new EB method is that it does not pass the same objects, there is no vCAC:Entity or vCAC:VirtualMachine - only a Properties object which holds the request properties. These include any custom properties from the blueprint.
My naming problem
I have a Machine Prefix setup for my lab which names machines “DefinIT-” and a three digit identifier. I want to be able to name my VMs based on properties in my blueprint, so lets say I want to include a value for location, type of VM, application and then have the three digit unique ID that is generated from the Machine Prefix.
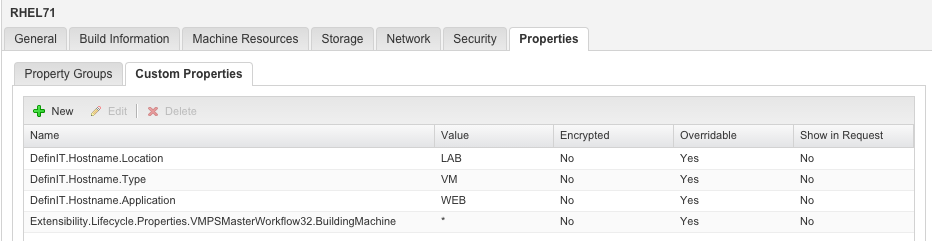
In my blueprint, I have created three custom Properties:
- DefinIT.Hostname.Location = “LAB”
- DefinIT.Hostname.Type = “VM”
- DefinIT.Hostname.Application = “WEB
My desired outcome is that the machine that would be DefinIT-001 gets renamed as LAB-VM-WEB-001.
Create an Action
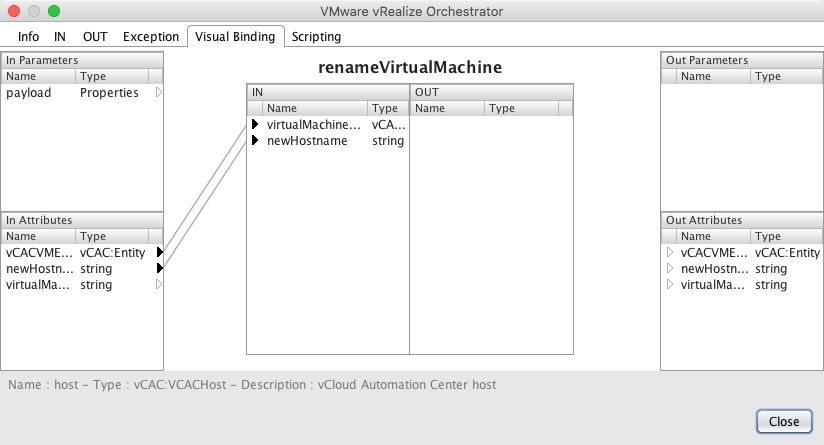
Not wishing to reinvent the wheel, I’ll use the renameVirtualMachine action from Ted Spinks’ blog article “Manage Hostnames with vRealize Automation – Part 2: Use a small vRO workflow”. Create the action as described in the article and then drag it onto the canvas. You can see that it requires two inputs - a vCAC:Entity representing the Virtual Machine, and a string for the newHostname.

Creating the main workflow
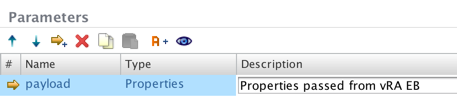
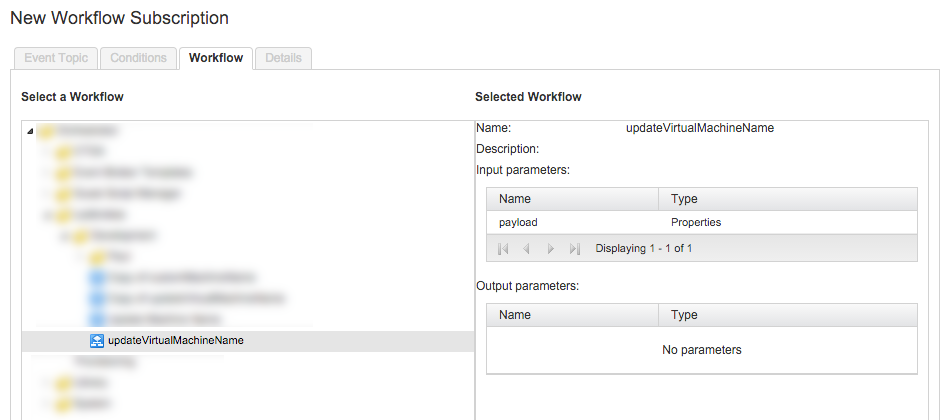
I created a new workflow - updateVirtualMachineName and created a “payload” input of type “Properties” - this is the properties object that the vRA EB will pass to Orchestrator.
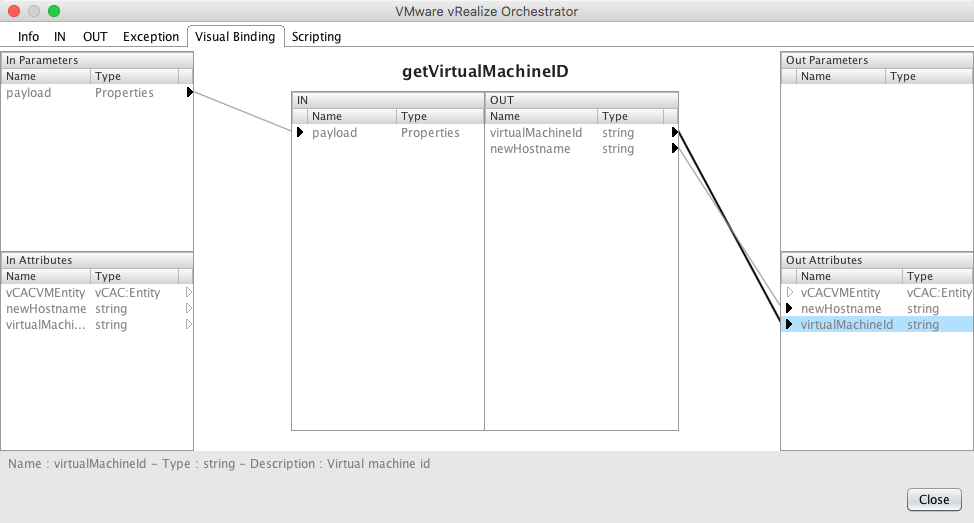
Move to the schema tab and drag a new scriptable task onto the canvas. Edit it and name it “getVirtualMachineID”. Using the Visual Binding tab, drag the payload in parameter to the input pane so we get the Properties as an input to this task. Create two OUT parameters that map to Attributes in the main workflow. These are both strings “newHostname” and “virtualMachineID”:
Edit the scripting tab and enter the script (copy from below).
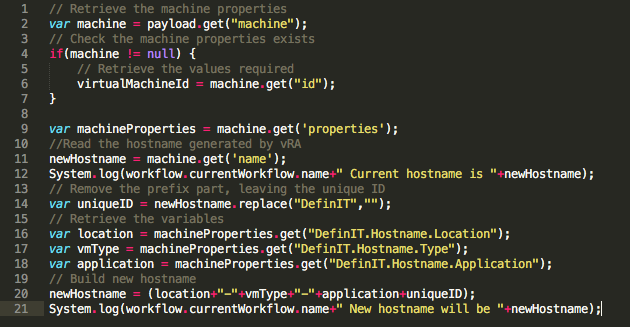
Basically we retrieve a properties variable “machine” from the “payload” input (2), then retrieve the “id” value of “machine” (6). We will use this in a minute to retrieve the vCAC:Entity.
Next we retrieve another Properties object, this time from the machine (9). That Properties object contains the properties defined in the blueprint - including our Hostname variables.
We also define retrieve the “name” property of the “machine” object (11), which is the vRealize generated hostname (e.g. DefinIT-001). Using string replacement, we strip out the “DefinIT” portion of the hostname to leave the unique ID (e.g. “-001”) (14).
Then we retrieve the variables by name from the “machineProperties” object for the new hostname (16-18). Finally, we build the string and assign it to the “newHostname” out parameter (20).
// Retrieve the machine properties
var machine = payload.get("machine");
// Check the machine properties exists
if(machine != null) {
	// Retrieve the values required
	virtualMachineId = machine.get("id");
}

var machineProperties = machine.get('properties');
//Read the hostname generated by vRA
newHostname = machine.get('name');
System.log(workflow.currentWorkflow.name+" Current hostname is "+newHostname);
// Remove the prefix part, leaving the unique ID
var uniqueID = newHostname.replace("DefinIT","");
// Retrieve the variables
var location = machineProperties.get("DefinIT.Hostname.Location");
var vmType = machineProperties.get("DefinIT.Hostname.Type");
var application = machineProperties.get("DefinIT.Hostname.Application");
// Build new hostname
newHostname = (location+"-"+vmType+"-"+application+uniqueID);
System.log(workflow.currentWorkflow.name+" New hostname will be "+newHostname);
Close the scripting action and then search for the “getVirtualMachineEntityFromId” action, and drag it onto the Schema. Search for the “renameVirtualMachine” action we created earlier and drag that onto the Schema too. The schema should look something like this:

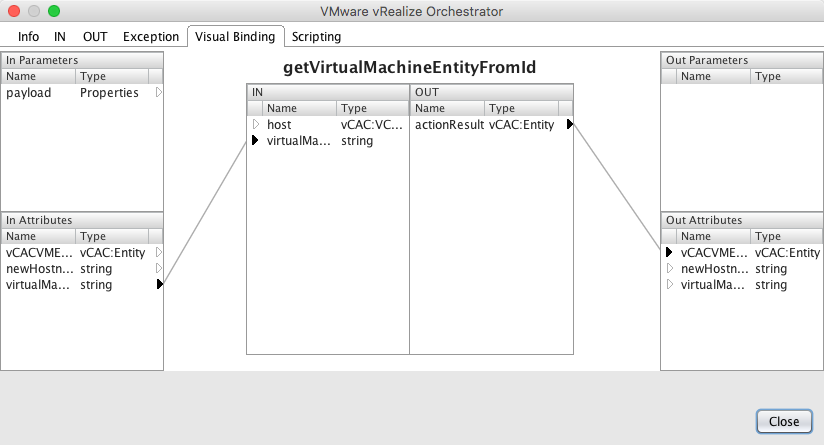
Use the Visual Binding view of “getVirtualMachineEntityFromId” to link up the “virtualMachineId” attribute and drag the “actionResult” OUT to the Out Attributes pane (I changed the attribute name to “vCACVMEntity”). Don’t forget to go to the IN tab and bind “host” to NULL - the action will find the host for us.
Next bind the input parameters for the “renameVirtualMachine action”, mapping the “newHostname” and “vCACVMEntity” attributes.
Save and close the workflow.
Creating the event subscription
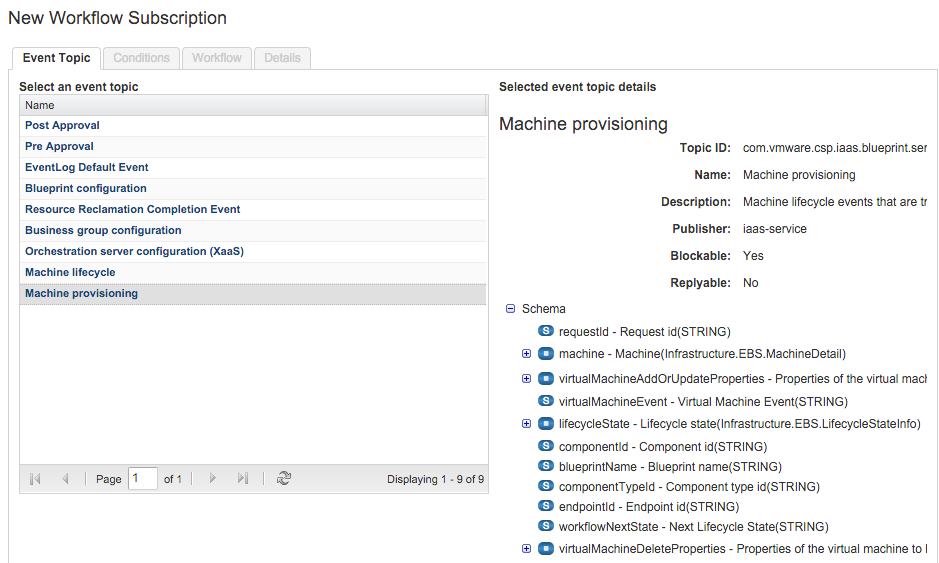
Log into vRealize Automation and navigate Administration > Events > Subscriptions, then click for a new Subscription. Select the “Machine provisioning” topic and click next.
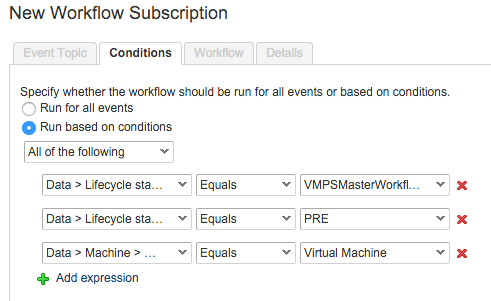
As discussed, we need the workflow to run at BuildingMachine, before any work has been done with the VM. There’s a bug in the EB subscription wizard that won’t let you create an “All of the following” condition without adding three clauses (you can add three, then remove two of them later, it’s just the initial creation that fails!).
Add the following conditions:
- “Data > Lifecycle state name” Equals “VMPSMasterWorkflow32.BuildingMachine”
- “Data > Lifecycle state phase” Equals “PRE”
- “Data > Machine > Machine type” Equals “Virtual Machine”
Select the workflow created earlier:
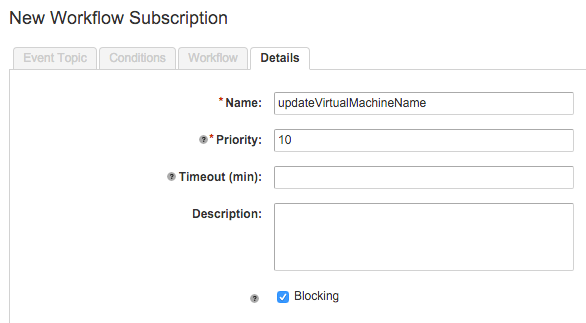
Next, name the subscription, leave the priority as default and make sure you check the “Blocking” option. If we don’t create a blocking subscription, the workflow won’t wait for the result of the Orchestrator workflow and will continue to the next state. When the workflow attempts to rename the vCAC:Entity, it will be too late. Click finish to complete the subscription.
Select the subscription in the list and click the “Publish” button.
Prepare the blueprint
Finally, we need to add the custom properties to the blueprint to ensure the “payload” is passed through to orchestrator from the Event Broker.
Edit the blueprint and add the three properties from before, as well as the following:
Extensibility.Lifecycle.Properties.VMPSMasterWorkflow32.BuildingMachine
This property is critical because it tells the EB to pass through all of the properties related to the BuildingMachine lifecycle state. The value of “*” is a wildcard and allows us to inject all the values relating to BuildingMachine.
Download
You can download the org.definit.eventbroker package from my GitHub page, including the action and workflow example.
Conclusion
Getting my head around how the Event Broker passes information to the Orchestrator workflow has been a very steep learning curve, but I know that there are some excellent resources soon to be published from VMware that will make adoption of the EB subscription model much easier to consume.
For me the Event Broker is the single biggest leap forward for vRealize Automation 7 - the sheer flexibility and power of the tool is huge. It’s well worth drudging through the documentation and scant examples out there to learn this tool.
I hope this example allows others to get their head around it all quicker!