
This is the second part of the 3rd article in a series about how to build-out a simple vCAC 6 installation to a distributed model.
By the end of this part, we will not have modified the vCAC deployment in any way, we’ll just have 3 configured load balanced URLs

vCAC Simple Install with vPostgres deployed and load balancers prepared
An overview of the steps required are below:
- Issue and install certificates
- Deploy an external vPostgres appliance and migrate the vCAC database
- Configure load balancing
- Deploy a second vCAC appliance and configure clustering
- Install and configure additional IaaS server
- Deploy vCenter Orchestrator Appliance cluster
I’ve previously configured 3 DNS records for the load balanced services (see part 3.1), this only covers the steps required to configure NSX load balancers.

Deploy NSX Edge load balancer for vCAC#
Deploying an NSX Edge device is (not surprisingly) very similar to deploying a vShield Edge appliance.
Log on to the vSphere Web Client and select the “Networking and Security” page to open the NSX management. Select the “NSX Edges” pane and then click the little green + symbol to start deploying a new Edge device.

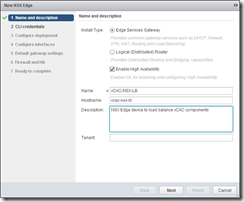
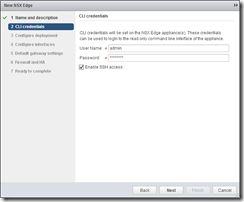
Look familiar? Yes, thought it might! Check “Edge Services Gateway”, the “Enable High Availability” box, and then give a Name and Hostname for the new edge – I’m using vCAC-NSX-LB. Enter a description and click next. Enter credentials for your NSX edge device – at least 12 characters and complex, and enable SSH if required (tip – useful for troubleshooting NSX!)
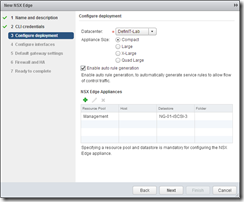
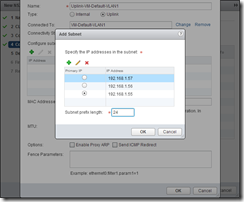
Again, the same a vCNS, select the Datacenter, size and rule generation, then add an Edge Appliance, specifying the Cluster/Datastore for the appliance to reside. Next add a new interface, an Uplink to the vCAC network with the same 3 IP addresses specified before for the load balanced DNS records.
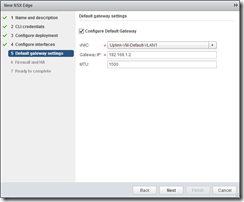
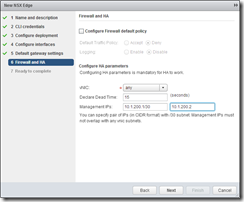
Configure a Default Gateway (or not, if you don’t plan to route). By default, the Edge appliance will firewall and will set default DENY rule – so, you can specify a Firewall default policy of “Accept” here, or add rules for HTTP/HTTPS to the load balance members later (despite the image, I configured to Accept). Specify a pair of IP addresses on a /30 subnet for the HA communication.
And complete the wizard
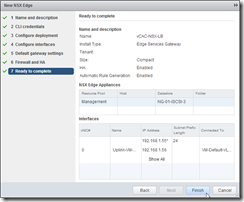
And much the same as vShield, wait for the Edge to deploy.

Configure NSX Load Balancing#
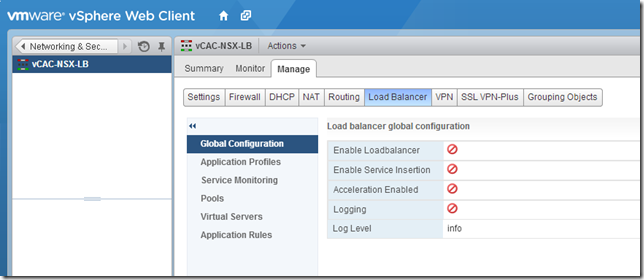
Once deployed, double click on the NSX Edge to open the configuration, then click “Manage” and select “Load Balancer”.
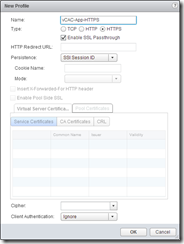
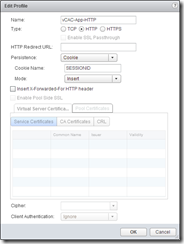
Here’s where things differ from vShield, it’s a LOT more configurable! First off, create a new Application Profile with a relevant name and a type of HTTPS. Select “Enable SSL Passthrough” unless you plan to offload the SSL termination at the load balancer – for simplicity I’m going to make it as close to the vShield setup in the previous article. Select “SSL Session ID” as the persistence method. This will only load balance HTTPS, so we also need to create an HTTP profile using COOKIE for persistence, name the cookie SESSIONID and use “Insert” as the cookie mode.
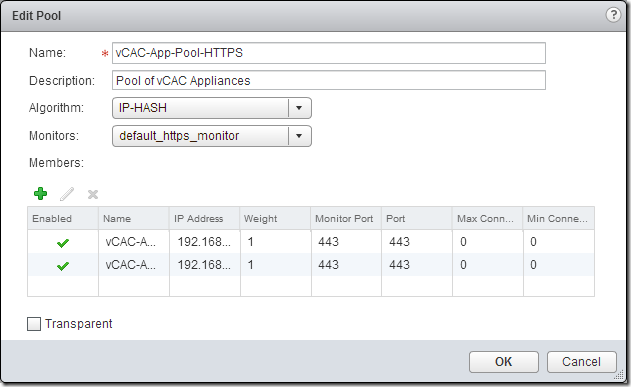
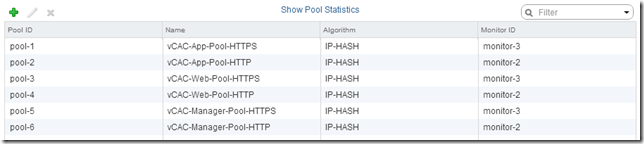
Next select the “Pools” page and create a new pool for the vCAC Appliance HTTPS, selecting IP-HASH as the algorithm and the default HTTPS monitor. Use the green + to add members to the pool, specifying 443 for the Port and Monitor Port for each member.
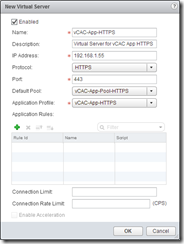
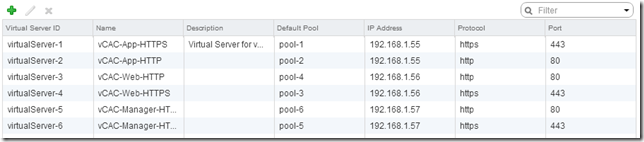
Next go to the Virtual Servers page and create a new Virtual Server for the vCAC Appliances HTTPS connections. Enter a name and description, the IP address relating to the DNS entry for the service (e.g. vcloud.definit.local is 192.168.1.55). Select HTTPS for the protocol and port 443. Next select the pool and the application profile we created in the previous steps.
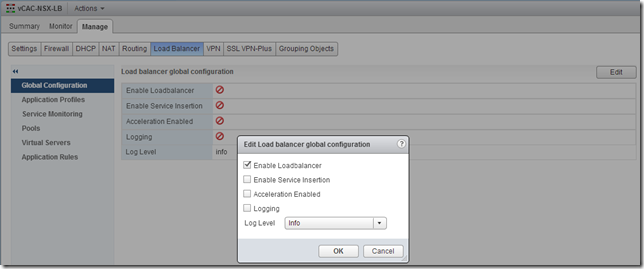
Finally, enable the load balancer by going to the “Global Configuration” page, clicking “Edit” and checking the “Enable Loadbalancer” box.
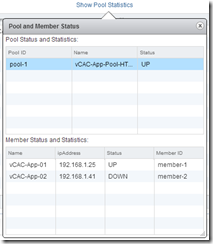
Click back on the “Pools” page and click the “Show Pool Statistics” link to view the status of the pool servers – just the same as with vShield, one member is up, and one is down.
Repeat this process to create a further 5 Pools, and 5 Virtual Servers:
| Pool Name |
| vCAC-App-Pool-HTTP |
| vCAC-Web-Pool-HTTPS |
| vCAC-Web-Pool-HTTP |
| vCAC-Manager-Pool-HTTPS |
| vCAC-Manager-Pool-HTTP |
| Name |
| vCAC-App-HTTP |
| vCAC-App-HTTPS |
| vCAC-Web-HTTP |
| vCAC-Web-HTTPS |
| vCAC-Manager-HTTP |
| vCAC-Manager-HTTPS |
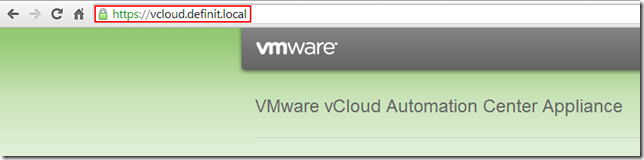
The final test is to load up the load balanced URL in the browser and check it is alive on my load balanced URL.
That’s it for this one – stay tuned for the next step, deploying a secondary vCAC Appliance and configuring clustering.