

Ensure that the Windows Firewall service is running (it doesn’t matter if the firewall is enabled or disabled, it should always be running! That’s a general rule, not just for this).
On the PowerShell host open a command prompt (*NOT* PowerShell console) as administrator and run the quickconfig command - you can re-run it if it’s already been run - but make sure it has.
winrm quickconfig
Enable basic authentication:
winrm set winrm/config/service/auth @{Basic="true"}
Finally, allow unencrypted data to be sent:
winrm set winrm/config/service @{AllowUnencrypted="true"}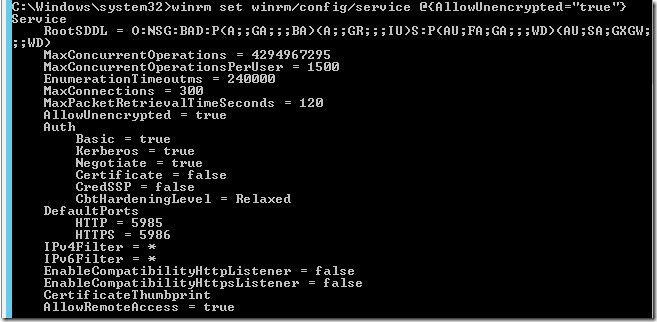
Testing WinRM configuration#
Note: you can do these steps locally on the PowerShell host, or from a remote machine - remote is a truer test.
On the PowerShell host, check that the port is open/listening:
netstat -an | find "5985"

On the WinRM client allow basic authentication (run quickconfig if required first!):
winrm set winrm/config/client/auth @{Basic="true"}And allow unencrypted:
winrm set winrm/config/client @{AllowUnencrypted="true"}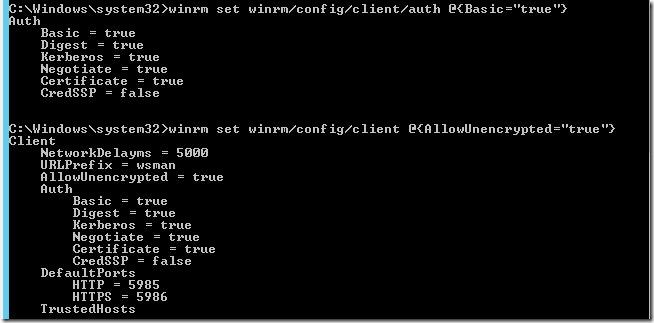
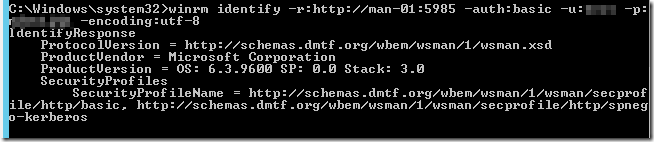
Finally, test you can connect to the PowerShell host using the winrm client:
winrm identify -r:http://man-01.definit.local:5985 -auth:basic -u:testuser -p:testpassword -encoding:utf-8
Now we know that the WinRM service is in fact listening and responding, we can move on to vRO/vCO
Adding the PowerShell host to vCO#
Firstly, make sure you have the latest plugin from the vRO/vCO site (https://www.vmware.com/support/pubs/vco_plugins_pubs.html). At the time of writing this is 1.0.4 which supports PowerShell 1.0, 2.0, 3.0 and 4.0 - so Windows Server 2012 R2 is supported. Previous versions didn’t support 4.0.
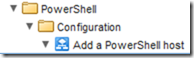
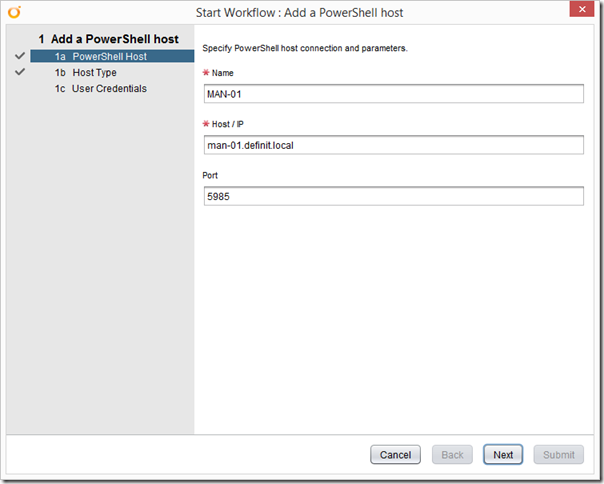
Run the “Add a PowerShell host” workflow:
Configure the name of the host, the FQDN or IP address and the port - remember for HTTP it’s 5985.
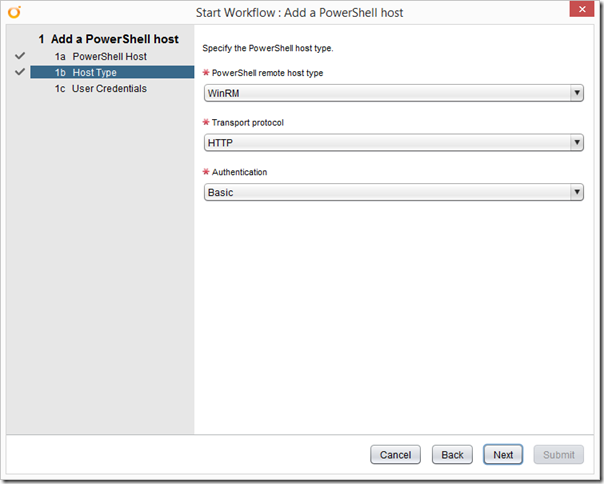
Select WinRM, HTTP and Basic Authentication.
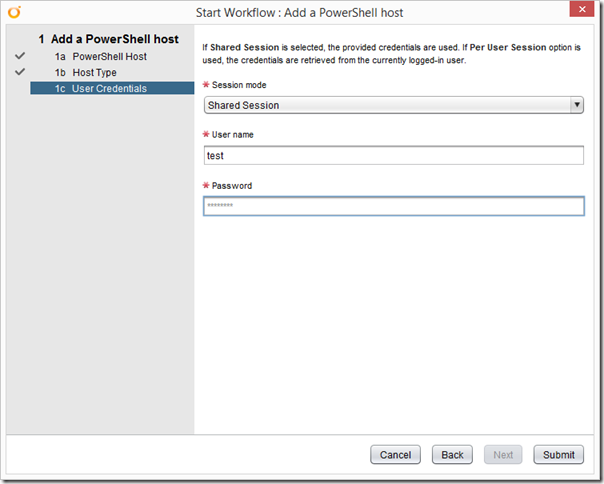
Finally, configure your Shared Session user details:
Sacrifice a small goat, and click submit. If you’ve been a good boy or girl, you’ll get a green tick:

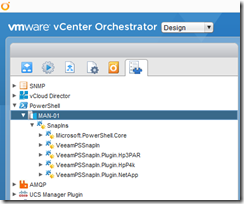
Switch to the Inventory tab and check you can browse the new PowerShell host:
Now you can start running your PowerShell scripts from vRO/vCO to your heart’s content.