Configuring and Using vRealize Orchestrator (vCO/vRO) Multi-node plugin
 Sam McGeown
 To quote the release notes for the latest version of vCO/vRO Multi-node Plugin:
The VMware vCenter Orchestrator Multi-Node Plug-In allows organizations to manage environments with multiple vCenter Orchestrator server instances.
As organizations increase their level of automation, they often find the need to deploy multiple Orchestrator instances. With the VMware vCenter Orchestrator Multi-Node Plug-In, administrators have a more efficient way to manage multiple Orchestrator instances from a central point. The plug-in allows administrators to log in to a master Orchestrator server to view the inventories and workflows of remote Orchestrator servers, and to trigger workflows remotely.
The Multi-Node plug-in also makes it easier for administrators to manage workflow packages. From a single Orchestrator server, administrators can push packages to one or more remote Orchestrator servers and ensure that all instances are in sync with the same workflow versions.
Installation of the plugin is a really simple affair, just download and import the plugin file on your “master” node, then add the “slave” vCO servers to the inventory.
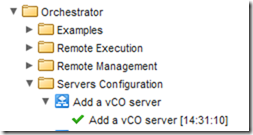
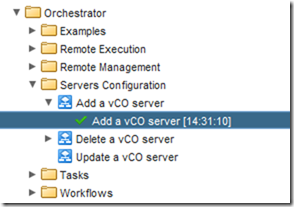
Add a vCO server
Adding a new remote vCO server is really simple - just run the “Add a vCO server” workflow from your Library:
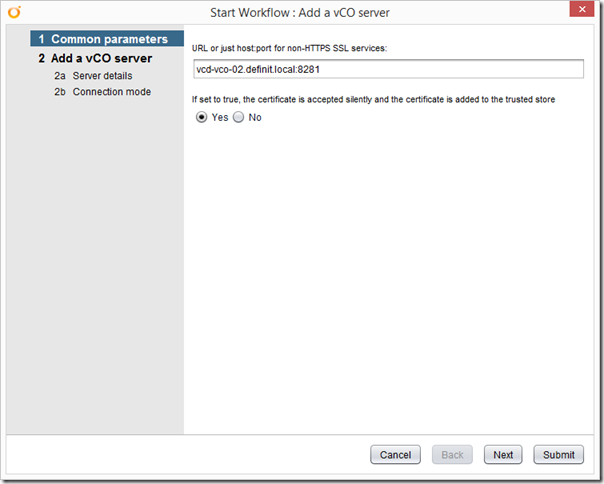
Enter the FQDN and port of your vRO/vCO instance - I found the wording of this form a bit confusing, stick with the FQDN and port and you’ll be fine. Decide whether you want to silently accept the SSL certificate (if you chose No then you need to make sure that your “master” vCO/vRO instance trusts the certificate presented by the “slave” vCO/vRO node).
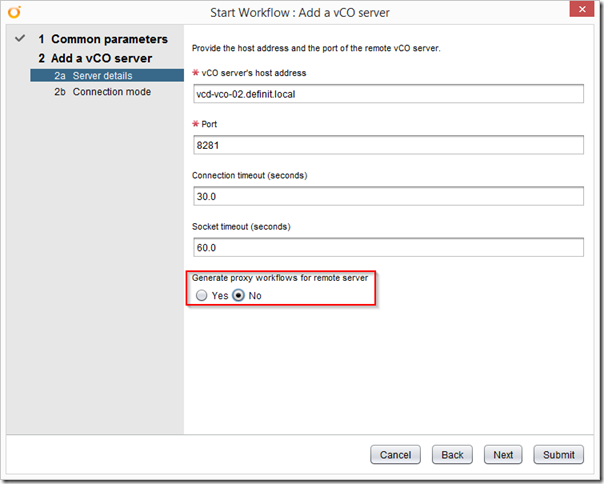
Next, add the FQDN and port of the vCO/vRO server you’re going to connect to. I know, you just did that right? Do it again and stop asking silly questions! You can configure the connection and socket timeout for the remote instance, and then you have the option to “Generate proxy workflows for remote server” - if you say yes here it will generate a proxy workflow for EVERY workflow on the “slave” vCO/vRO instance, which I find to be messy and a little pointless.
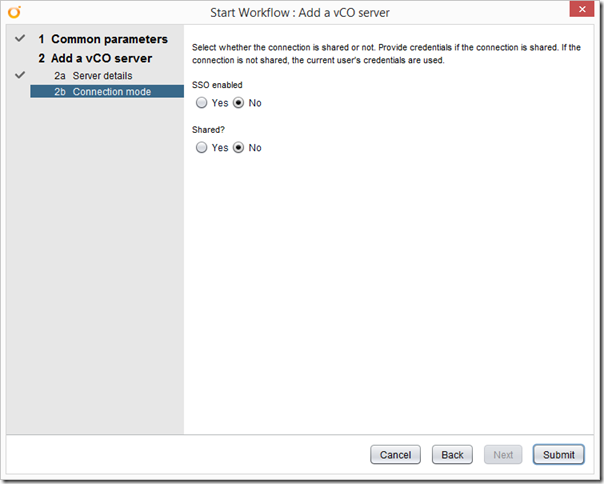
Finally, chose whether you’re going to use SSO (both vCO/vRO instances need to use the same SSO server if you do) and then whether you will use a shared connection (for which you would enter credentials) or use the credentials of whoever is executing the proxy workflow. I’m going without SSO and no shared sessions.
Submit the workflow, and hopefully you should see the magical green tick of happiness.
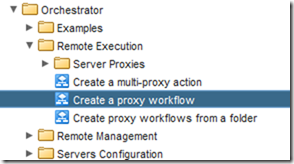
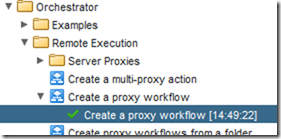
Creating a proxy workflow
Creating a proxy workflow is what allows you to execute the remote workflow on the “slave” instance - and it’s pretty easy to do using the “Create a proxy workflow” workflow!
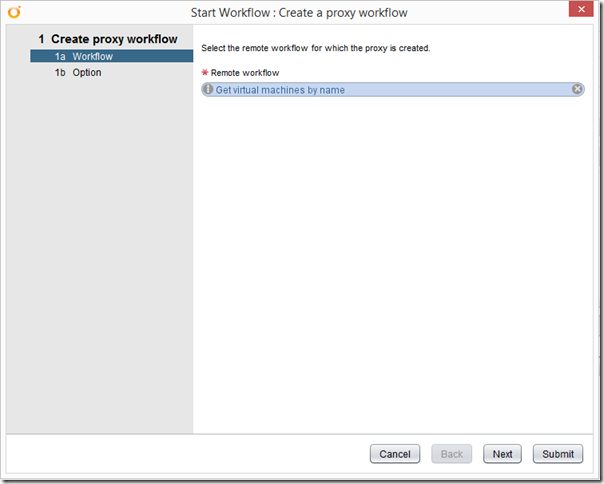
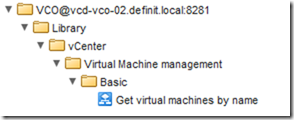
Run the workflow and then use the chooser to select the remote workflow you want to run. I’m just going to use a basic workflow from the vCenter plugin because I know that it’s simple, and it works locally.
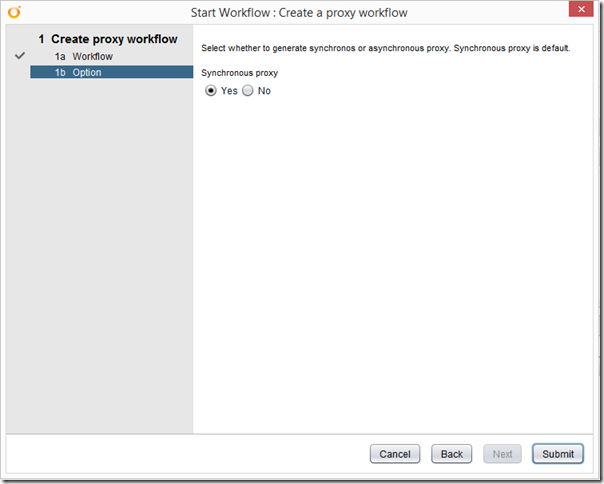
Decide whether you want to run it synchronously, or asynchronously…
Submit, and wait for the green tick. Once it’s completed you should have a new folder structure for the remote “slave” vCO/vRO instance and a workflow named exactly the same as the one we just generated a proxy for.
Taking a closer look at a proxy workflow
The first thing to note is that the remote vCO/vRO server object is added as a protected Attribute for the workflow

The inputs for the “Get virtual machines by name” have been replicated (there’s only one):

The Outputs are a little more interesting - ever heard of a VCO:RemotePluginObject?! Me either - the original workflow returns an array of VC:VirtualMachine objects. It looks like the RemotePluginObject is just a generic way of representing the objects returned that doesn’t require any additional libraries/definitions.

Looking at the generated schema it’s a pretty simple workflow; two scripting blocks and a waitEvent.
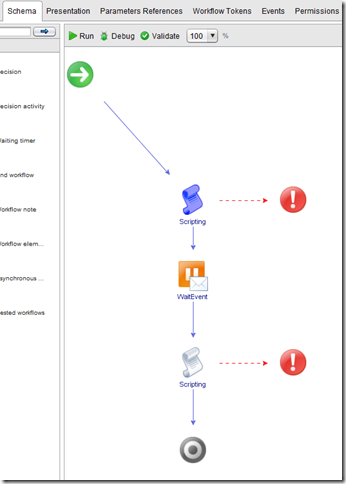
If I open the first scripting block, we can see that it’s again very simple - and in fact can be greatly improved upon! Remember we saw the remote vCO/vRO server object as an attribute? Well that has a property “connectionId” which really should be used instead of a string here - I’ll show that in a minute. We can also see the ID of the workflow we want to run, which is again represented as a string and should probably be done a little smarter.
Reading on through the script, we create a Properties object and add the “criteria” input to it. We then execute the workflow using those three variables, the remote server connection, the workflow ID and the parameters - easy.
Finally, we retrieve the “trigger” and “remoteToken” objects to use later in the script.

 The WaitEvent takes the “trigger” object as an input a simply waits for the workflow to report it’s completed.
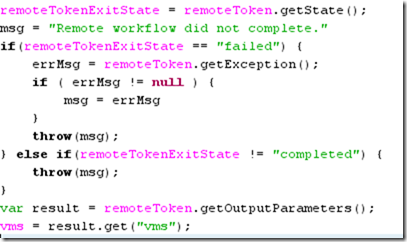
Then, the final scripting block uses the “remoteToken” object to retrieve the workflow’s state, and throws an error if the workflow state is anything other than “completed”. Finally, it gets the output from the remotely executed workflow (“vms”) and assigns it to the output of the proxy workflow.
Improving the stock remote workflow execution
In my experience, there are a couple of easy wins to improve the proxy workflow that is generated - here’s how:
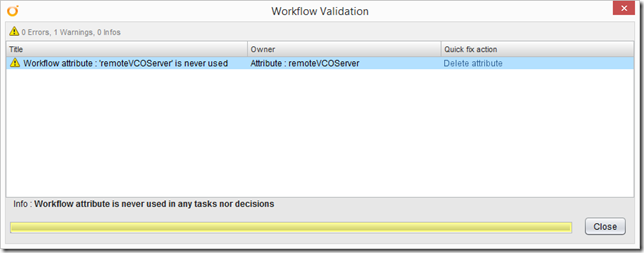
The first is sort of hinted at when you validate the workflow - the “remoteVCOServer” attribute is never used.
As I mentioned before, the ID represented by a string in the first script block is actually a property of the “remoteVCOServer” object, so we could use that rather than hard coding the ID. This would allow for greater flexibility if the remote workflow changed - we could always just point the attribute at a new object rather than having to manually put in the new GUID.
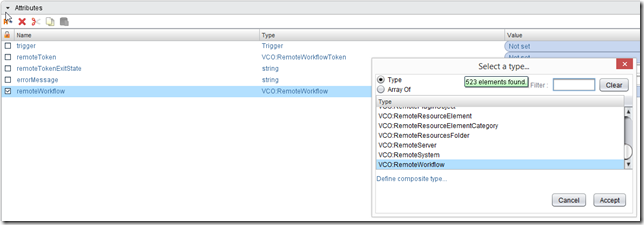
However, if we use a VCO:RemoteWorkflow object it has a property (workflowId) which has not only the ID of the workflow, but the remoteVCOServer too - two birds, one simple stone.
To modify the automatically generated workflow, go to the proxy workflow’s Attributes, delete the “remoteVCOServer” attribute and add a new attribute of type VCO:RemoteWorkflow called “remoteWorkflow” (don’t forget to protect it using the little check-box on the left):
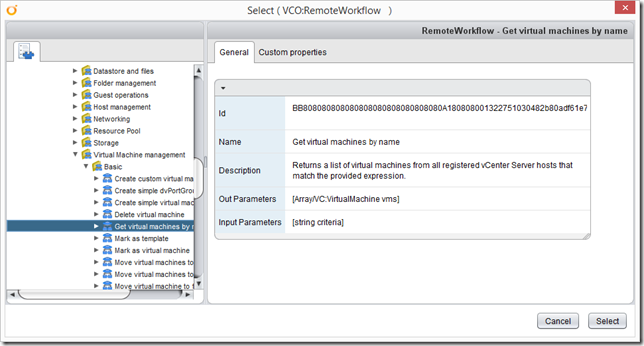
Then use the chooser to select the remote workflow we want to run (notice the Id property matches the workflowId string in the above script):
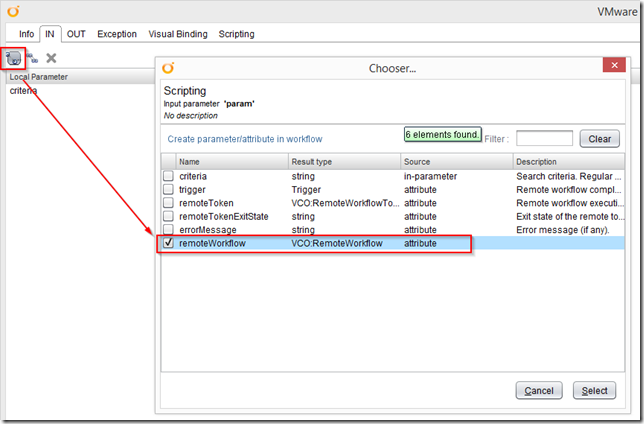
Now jump back to the first script block and add the workflow object as an IN parameter:
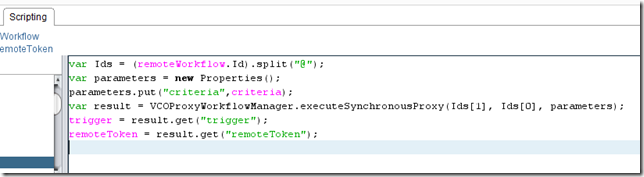
The remoteWorkflow.Id property is a string in the format of workflowId@remoteVCOServerId, so we can use the string.split() method to get the two strings we require - here the result of the split is put into a variable “Ids” and then accessed using the index:
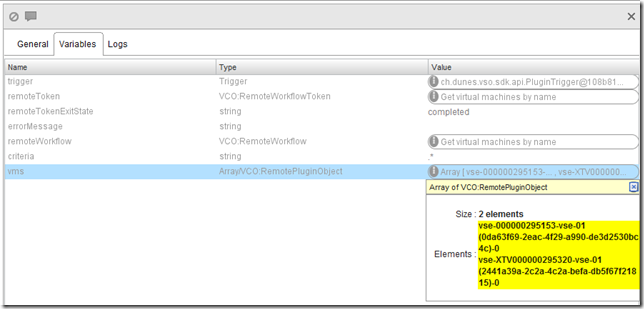
So, to test these modifications I will run the workflow using “.*” as the regular expression, which should return all of the VMs running on the vCenter server configured on the second (remote) vCO/vRO instance. You should be able to see that there are a couple of returned VMs from the remote vCenter workflow:
Happy orchestrating!