Warning: This article is now 11 years old! It is highly likely that this information is out of date and the author will have completely forgotten about it. Please take care when following any guidance to ensure you have up-to-date recommendations.
vSphere 6 HA SSO (PSC) with NetScaler VPX Load Balancer for vRealize Automation
Providing a highly available single sign on for vRealize Automation is a fundamental part of ensuring the availability of the platform. Traditionally, (vCAC) vRA uses the Identity Appliance and relies on vSphere HA to provide the availability of the SSO platform, but in a fully distributed HA environment that’s not really good enough. It’s also possible to use the vSphere 5.5 SSO install in a HA configuration - however, many companies are making the move to the latest version of vSphere and don’t necessarily want to maintain a 5.5 HA SSO instance.
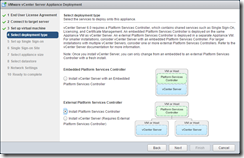
The vSphere 6 Platform Services Controller can be deployed as an appliance or installed on a Windows host - personally I am a huge fan of the appliances and I tend to use them in my designs because of the simplicity and ease of use. A pair of PSCs can be deployed as a highly available SSO solution for vRealize Automation 6.2, replacing the Identity Appliance or vSphere 5.5. SSO, using either a NetScaler or F5 load balancer to load balance connections and provide the availability.
Personally, I’d prefer to use an NSX Edge Services Gateway to load balance the PSCs, but at the time of writing the Edge does not support the “Ability to have session affinity to the same PSC node across all configured ports”. See KB2112736 for more details.
So, this guide will show you how to create a highly available pair of Platform Service Controllers, configure one as a subordinate Certificate Authority to a Microsoft Certificate Services CA, and then load balance them with a NetScaler VPX. Although I am using just two node, you can in fact use the same method to load balance up to four.
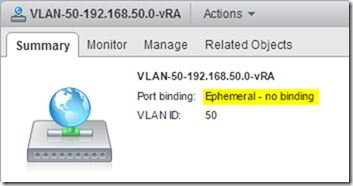
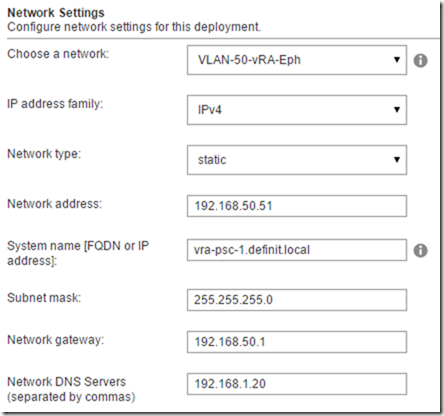
Ensure that the target Distributed Port Group’s port binding is set to Ephemeral. This is a requirement for the vSphere 6 vCenter Server Appliance deploy because it’s pushing the appliance to an ESXi host not a vCenter Server. Once the appliances have been deployed they can be migrated to a non-Ephemeral port group.
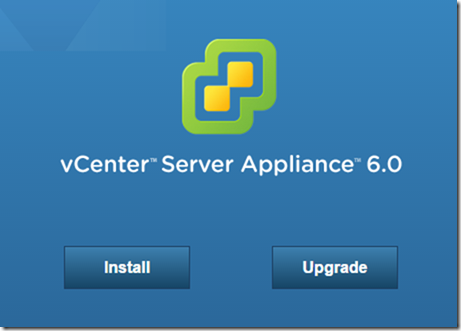
Run the vCenter Server Appliance installer (vcsa-setup.html on the ISO), at this point you might need to install the Client Integration Plugin. Click Install.
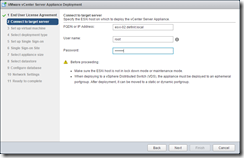
Accept the EULA and configure the target ESXi host
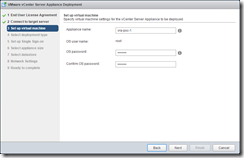
Accept any SSL warning and then configure the appliance name and root password. Select the PSC install type.
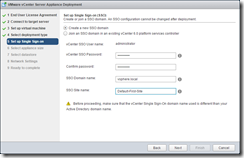
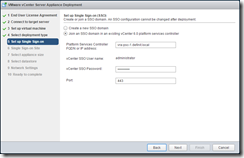
Configure the new SSO domain. The PSC is 2 CPU and 2GB of RAM with 30GB disk
Note: For vRealize Automation it must use the default domain “vsphere.local” and site name “Default-First-Site”.
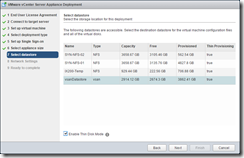
Select the target storage and configure the networking.
Note: As I mentioned earlier, only Ephemeral port groups are visible here.
Configure NTP - NTP is critical for vRA deployments, and enable SSH because we’ll need it later to configure the PSC HA.
The second PSC node is identical to the first, save the name (I’m using vra-psc-2) and the SSO configuration. Instead of creating a new domain, we join the second node to the SSO for the first node, and select the previously created site:
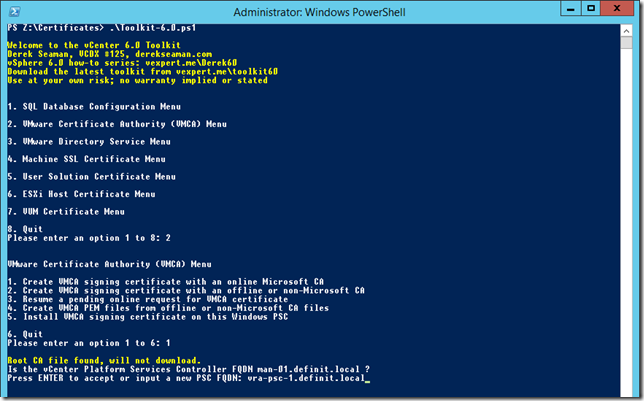
I use Derek Seaman’s instructions, and awesome toolkit to help generate SSL certificates for vSphere. Follow the process carefully to create a VMCA certificate for both PSCs.
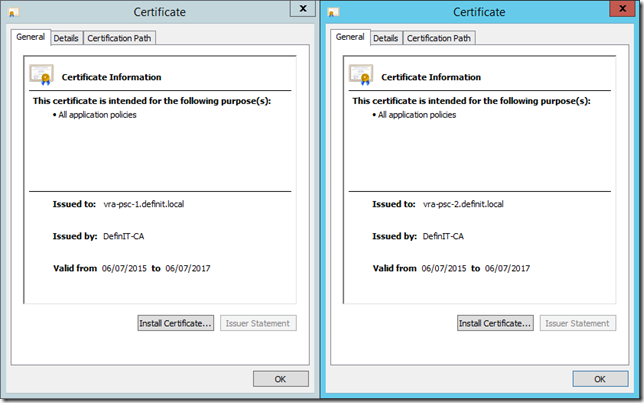
The certificates are generated in a folder called VMCA, under the folder configured in the script for output. Copy the output to a separate folder before generating the second CA certificate. To be clear, you need a VMCA certificate generated for each PSC node, using the PSC node’s FQDN, not the load balanced FQDN.
Upload and install the certificates using the instructions in Derek’s article - I’ve uploaded the two required files to /root/ssl
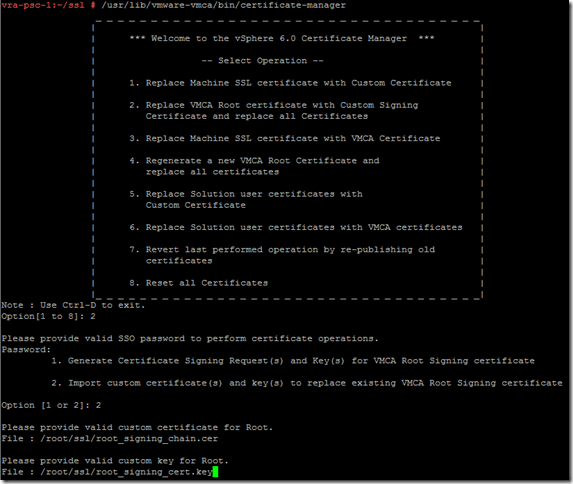
Run the certificate-manager script to replace the “VMCA root certificate with custom signing certificate and replace all certificates”
/usr/lib/vmware-vmca/bin/certificate-manager
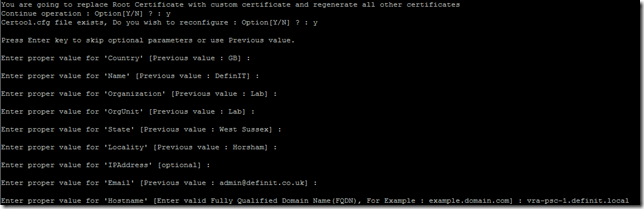
Configure the certificate configuration, ensuring that the “hostname” field is the FQDN of the PSC node:
Once the install is completed, restart the appliance, or restart all the vCenter Services using ‘service-control -stop -all’ and ‘service-control -start -all’.
Repeat on the 2nd PSC node using the certificates generated for it.
Download the HA scripts from VMware and copy them to the /tmp directory on the first PSC node. How you copy the zip file up to the appliances is up to you
If you find SCP problematic with the different shells, it’s possible to temporarily mount an NFS share to copy in/out and copied the file from there - e.g:
mount 192.168.1.97:/nfs/Temp /tmp/nfs -o nolock
cp /tmp/nfs/VMware-psc-ha-6.0.0.2503195.zip /tmp
However, if you’ve enabled bash as the default shell for the root user, just copy them up using WinSCP.
Once the scripts are on the appliance, create a /ha directory “mkdir /ha” then unzip the scripts to the /ha directory:
unzip VMware-psc-ha-6.0.0.2503195.zip -d /ha/
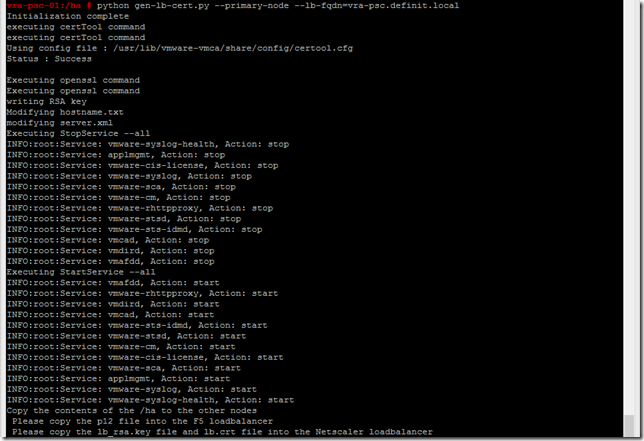
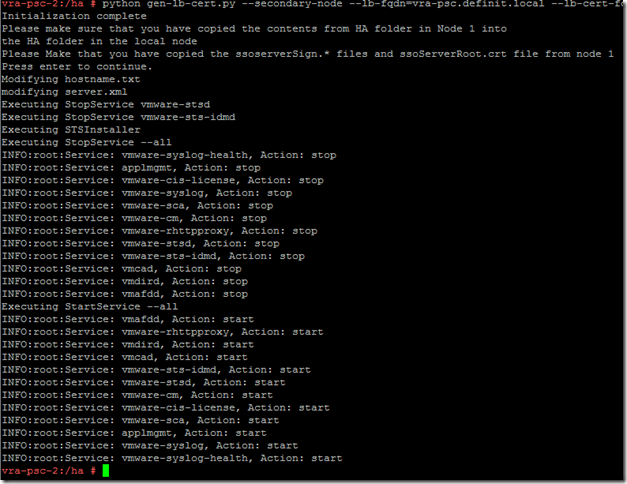
Still on the first PSC node, run the gen-lb-cert.py script using the FQDN of your load balancer:
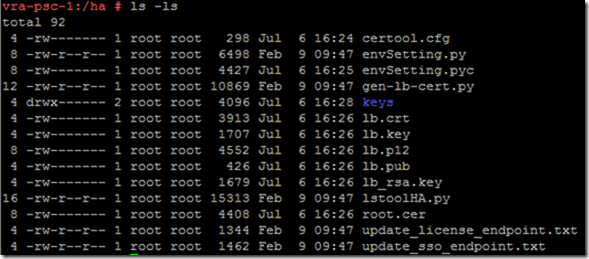
Copy the contents of the /ha folder over to the second node’s /ha folder. How you achieve this is up to you, WinSCP or a shared NFS mount work for me. It’s important to ensure that the “keys” folder is copied across, with the contents of /etc/vmware-sso/keys.
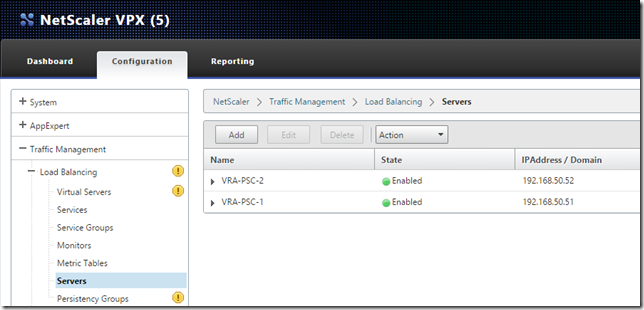
Let me just caveat this with “I am a NetScaler newbie” - this worked for me but if you’re a guru, you may know better!
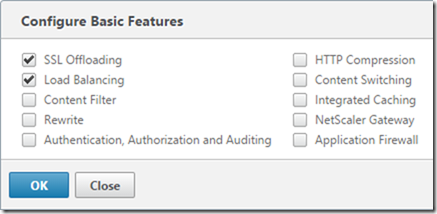
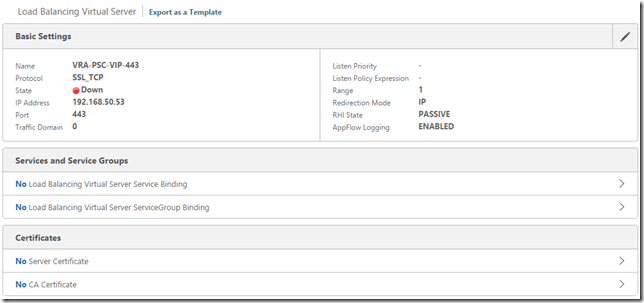
Ensure that you have SSL Offloading enabled before you start - System, Settings, Configure Basic Features. Failing to do so will mean your Virtual Server for port 443 won’t come up until you do - you’ll see in my screenshots below that I didn’t have it enabled, but by the magic of blogging I’ll make it look good and tell you here!
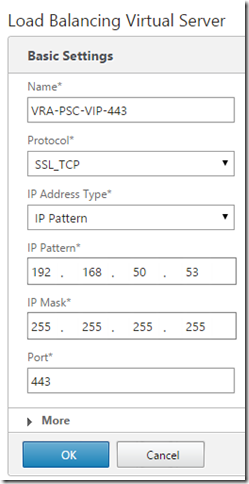
You’re presented with a summary of the Virtual Server:
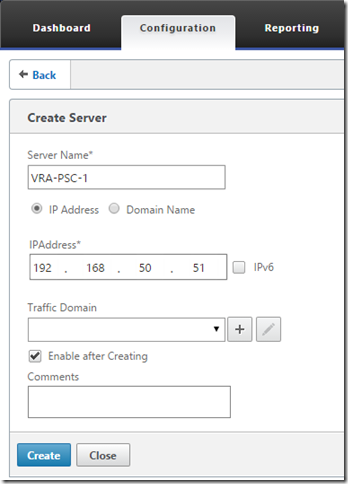
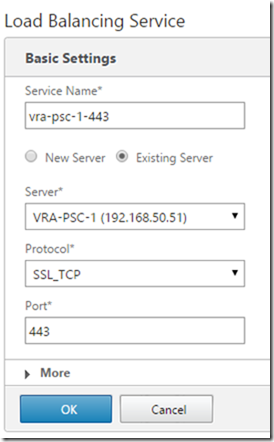
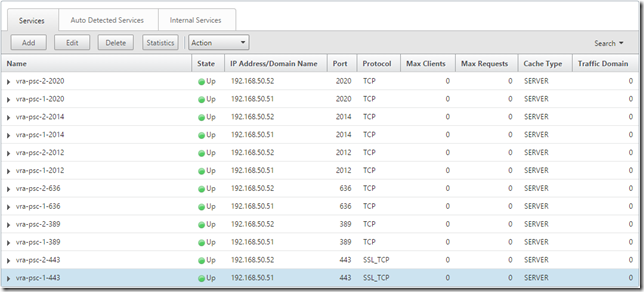
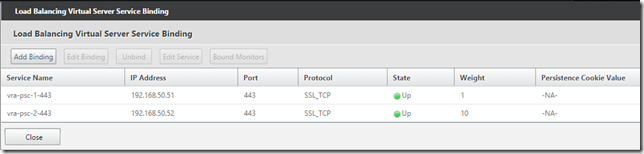
Click “No Load Balancing Virtual Server Service Binding” and add the two relating services, the first node with weight 1 and the second with weight 10:
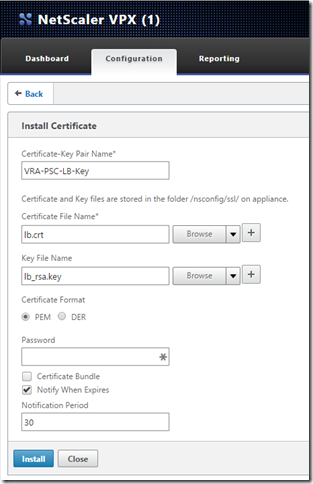
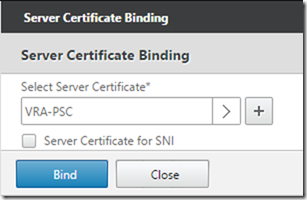
Click “No Server Certificate” and bind the PSC certificate we added earlier:
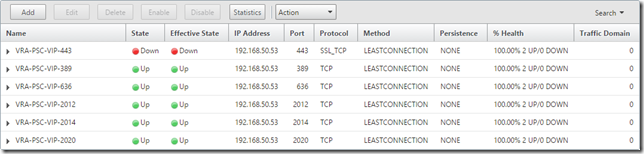
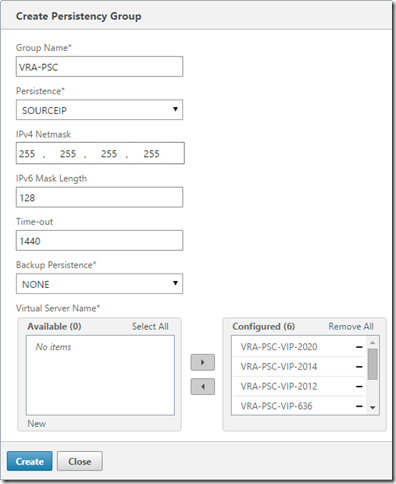
Once again, create a Virtual Server for each of the ports and bind the relevant Services (node 1 with weight 1, node 2 with weight 10) to each Virtual Server. Port 443 is the only one that requires the Server Certificate Binding.
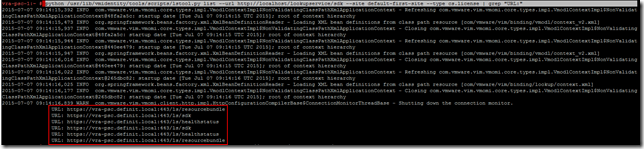
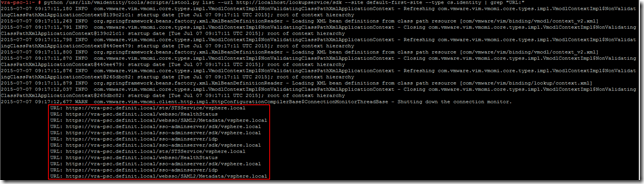
There’s a lot of output after that command, but once it’s completed the HA SSO should be complete.
We can verify the PSC endpoint is updated correctly using the following commands (if you followed this guide to set it up for vRA, the site name will be “default-first-site”):

 Providing a highly available single sign on for vRealize Automation is a fundamental part of ensuring the availability of the platform. Traditionally, (vCAC) vRA uses the Identity Appliance and relies on vSphere HA to provide the availability of the SSO platform, but in a fully distributed HA environment that’s not really good enough. It’s also possible to use the vSphere 5.5 SSO install in a HA configuration - however, many companies are making the move to the latest version of vSphere and don’t necessarily want to maintain a 5.5 HA SSO instance.