Deploying F5 BIG-IP Virtual Edition (VE) in AWS
 Sam McGeown
![]() Recently I was asked to develop some vRealize Orchestrator workflows against the F5 BIG-IP iControl REST API, but I was not able to test freely against a production appliance. After a lot of attempts to get in contact with F5 for a 90-day trial of the full version, or to purchase a lab license, I came up empty handed. The free version you can download from F5’s website is version 11.3, which does not feature the iControl REST API, which was released in 11.4.
Recently I was asked to develop some vRealize Orchestrator workflows against the F5 BIG-IP iControl REST API, but I was not able to test freely against a production appliance. After a lot of attempts to get in contact with F5 for a 90-day trial of the full version, or to purchase a lab license, I came up empty handed. The free version you can download from F5’s website is version 11.3, which does not feature the iControl REST API, which was released in 11.4.
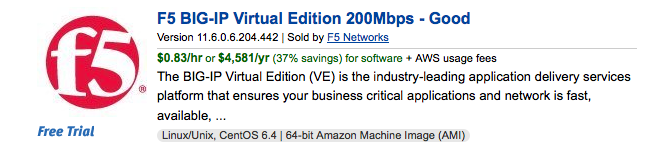
What I did notice while on the F5 site was the links to the AWS Marketplace where you can rent F5 BIG-IP Virtual Editions by the hour - $0.83/hr + AWS usage fees.
If you happen to have a license for BIG-IP there’s also a Bring Your Own License version, which would be handy. You can view all the options on F5 Network’s AWS Marketplace page.
Here’s how you set up your F5-in-AWS!
Prepare a VPC
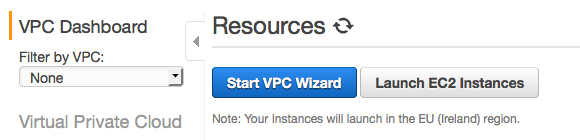
First of all, we need a VPC with three networks configured - Management, Internal and External. Log into the AWS Console and select the VPC Dashboard. You can either configure a new VPC, or configure the networks required in an existing VPC. For this post I’m going to use the “Start VPC Wizard” to create a new one.
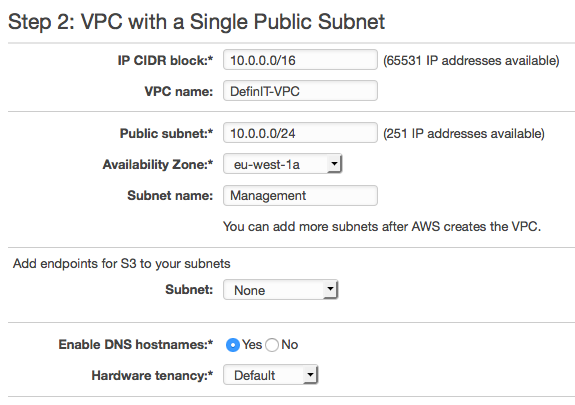
Select the “VPC with a Single Public Subnet” and click Select. Next we configure the first subnet - Management. AWS veterans will probably want to skim this bit, but for the uninitiated, here’s what we’re doing:
- IP CIDR block - this is a large IP block we can use within our VPC and sub-divide into smaller subnets. I’ve kept the default class B subnet (/16).
- VPC name - the name of the VPC we are creating
- Public subnet - a subnet of the IP CIDR block assigned to the VPC, in this case a /24 subnet.
- Availability Zone - AWS regions are broken up into Availability Zones, we don’t need to worry about that too much for this, except that we need all of the components assigned to the same availability zone - I’ve selected “eu-west-1a”.
- Subnet Name - the name of the Subnet we are creating - “Management”.
- The rest can stay as default
Hit “Create VPC” to finish.
Configuring Networks
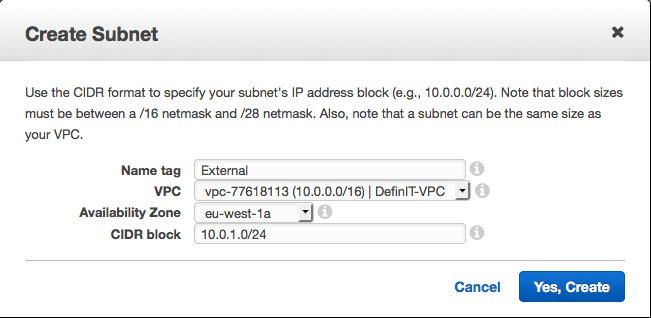
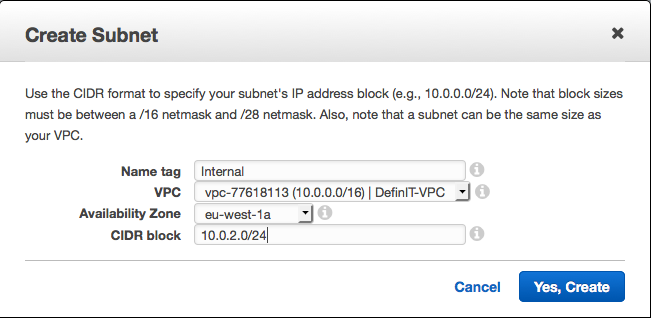
Select the “Subnets” page from the VPC Dashboard - you’ll see the Management network we just created. Hit the “Create Subnet” button and create two more subnets (don’t forget to select the same Availability Zone!):
External
Internal
Now you should have 3 networks configured:

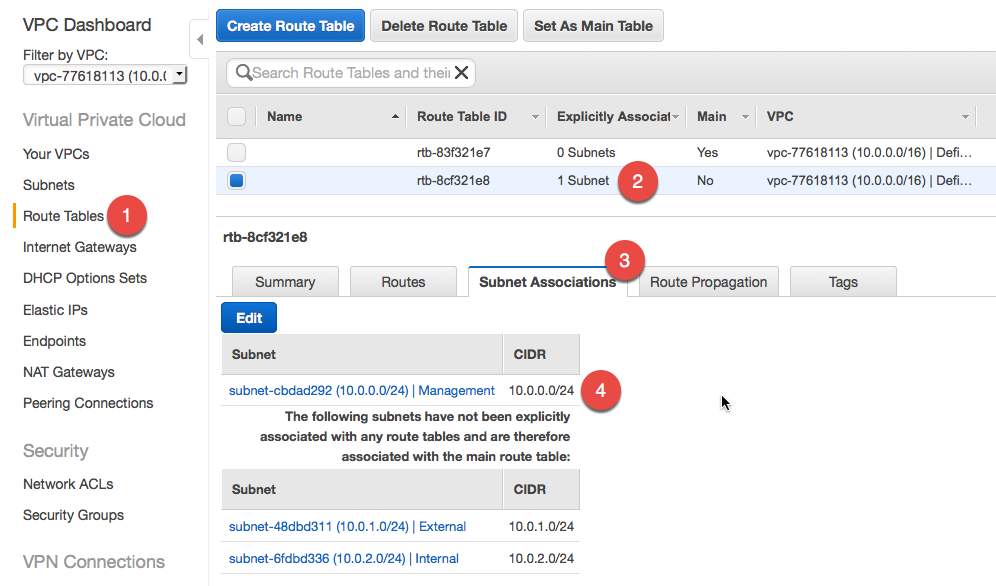
Next, we need to check the configuration of our Management network to use the Internet Gateway that is created by default with our VPC. Select the “Route Tables” page from the VPC Dashboard, then select the route table that has “1 Subnet” in the “Explicitly Associated” column. Select the “Subnet Associations” tab and ensure the Management subnet is associated:
Configure Security Groups
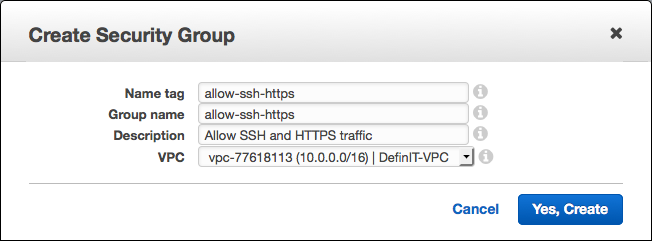
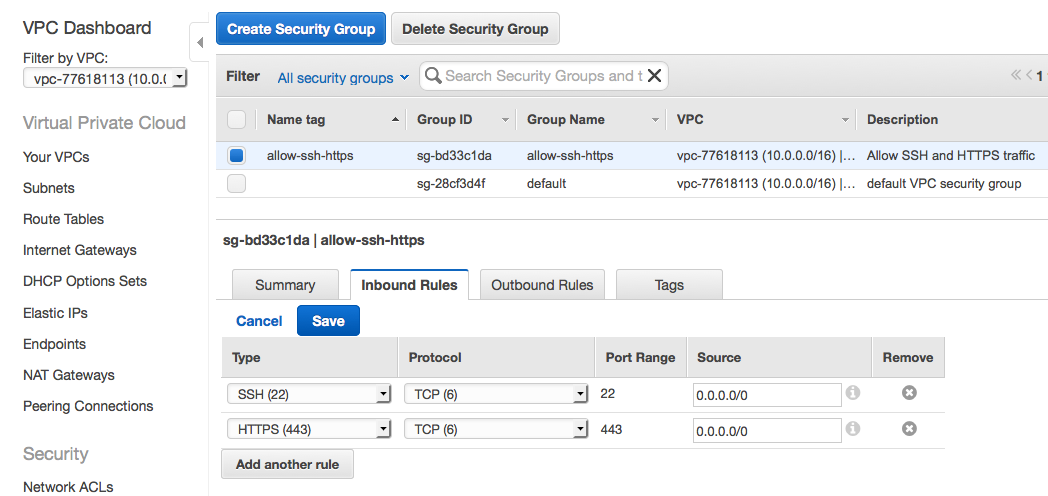
Select the “Security Groups” page from the VPC Dashboard - you should see a single default group has been created. Click “Create Security Group” and create a new security group:
allow-ssh-https
Select the new group, then select the “Inbound Rules” tab and configure to allow SSH and HTTPS:
Configuring EC2
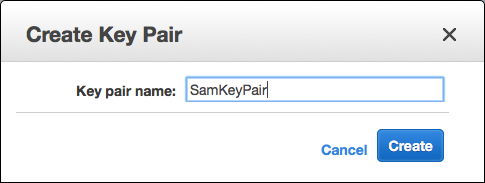
The final pre-requisite is to create a Key Pair to be used for authentication with the F5 instance. Open the EC2 dashboard and select the “Key Pairs” page. You can import your own Key Pair if preferred, but for ease of use we’ll hit “Create Key Pair”. Name the Key Pair something sensible, and save the resulting .pem file somewhere safe - losing it will mean losing access to your VM.
Launching F5 BIG-IP Virtual Edition
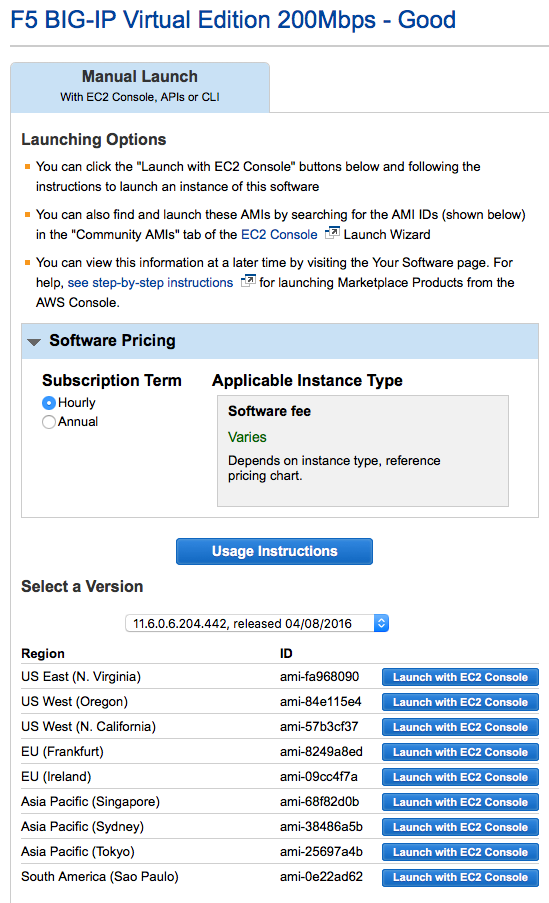
I elected to use the “F5 BIG-IP Virtual Edition 200Mbps - Good” option and signed in to my AWS account, selected the option and clicked continue. From there you can “Launch with EC2 Console. Launch it in the same Region as your newly created/configured VPC.
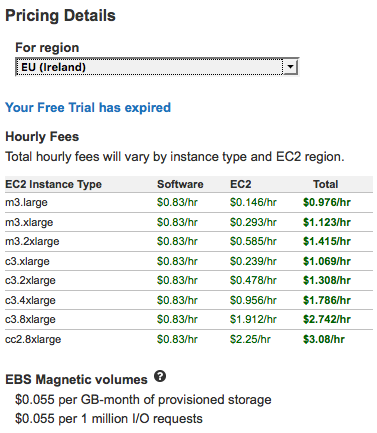
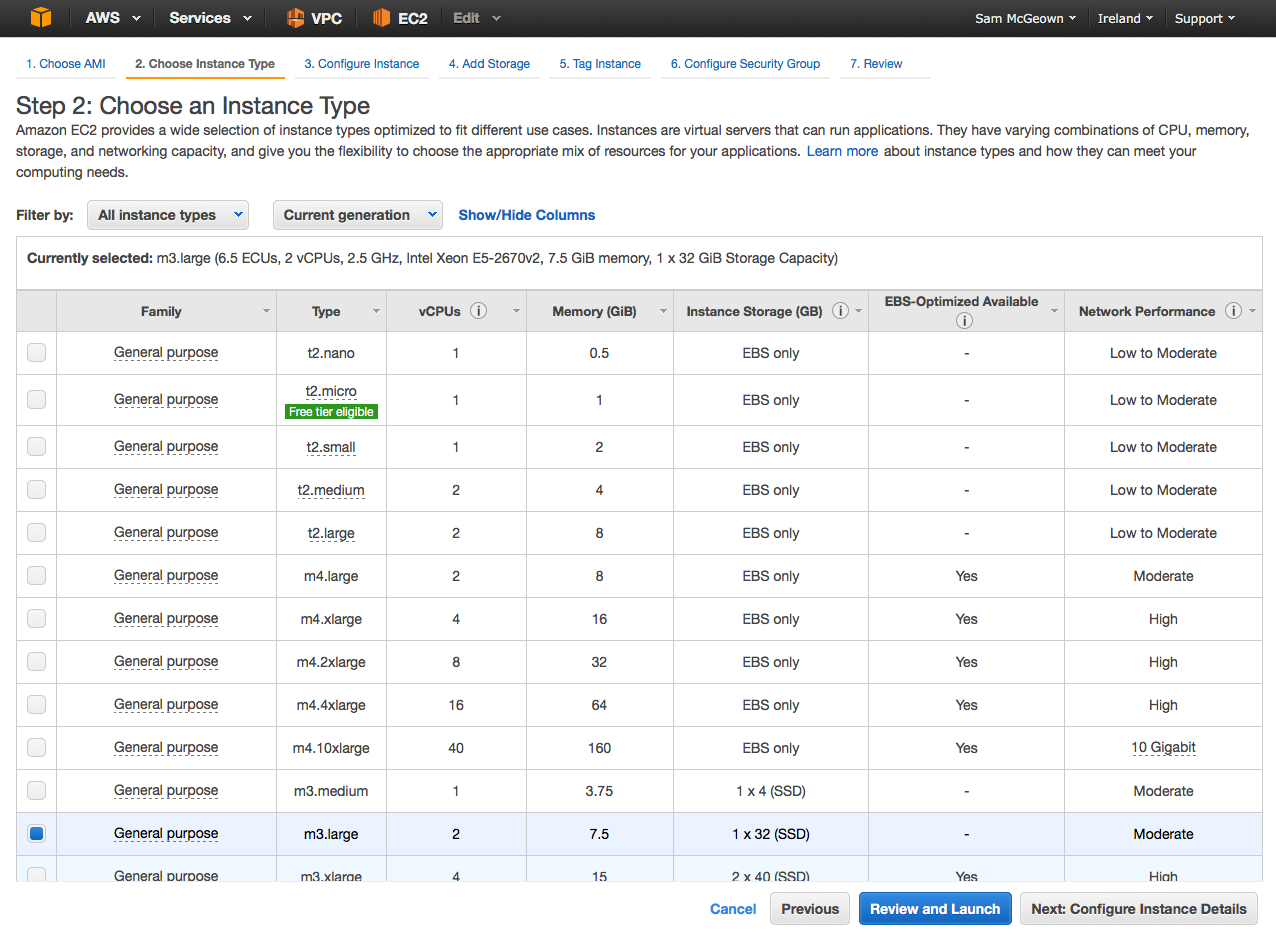
Next, we choose an Instance Type. From the previous page, we can see the minimum supported EC2 Instance Type is an m3.large ($0.146/hr), but there are plenty of options to go bigger:
Select the instance you require and click “Next: Configure Instance Details”
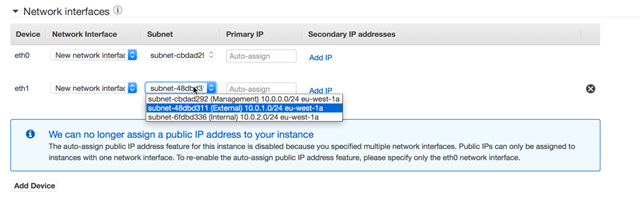
Ensure that the Network and Subnet selected are the correct VPC and the Management network we configured earlier – the rest of the settings can remain as they are, except the network interfaces.
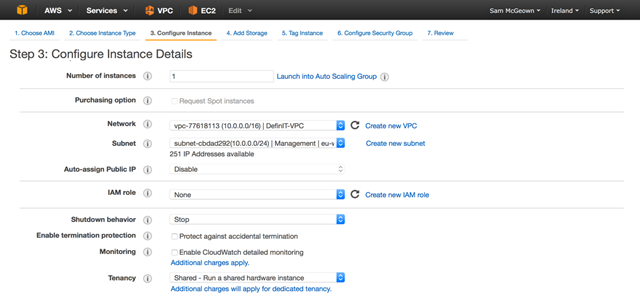
Add a second network interface and assign it to the External network. We can’t add a third interface just yet – we’ll do that later.
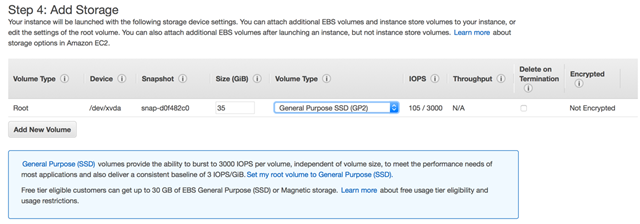
Hit “Next: Add Storage” and configure the storage for the instance. I picked SSD because I wanted to have some performance, but to be honest I think Magnetic would be fine in this instance.
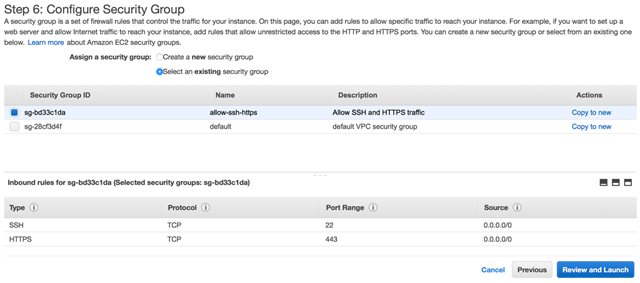
Click “Next: Tag instance” and configure any tags you’d like – I left mine blank, then click “Next: Configure Security Group”. Select an existing security group and then select the group we created earlier “allow-ssh-https”. Then click Review and launch:
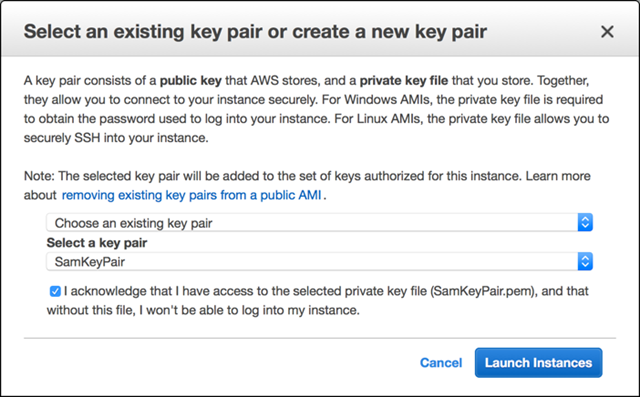
Review the settings again before finally hitting “Launch” – you’ll be prompted for your key pair – select the key pair created earlier and check the box to say you’ve got it!
Configure External Access
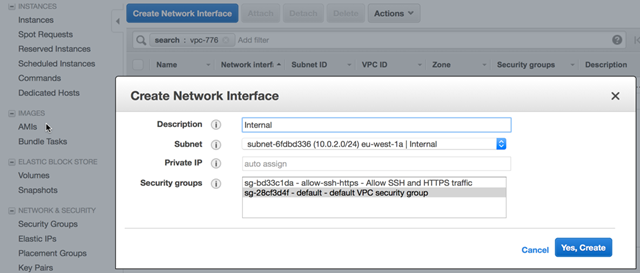
While the instance is starting we can add the final network card by selecting the Network Interfaces tab from the EC2 console page, then using the “Create Network Interface” button. Name the interface something relevant like “Internal”, select the Internal network subnet we created earlier, let the IP assign automatically and select the default VPC security group for the interface.
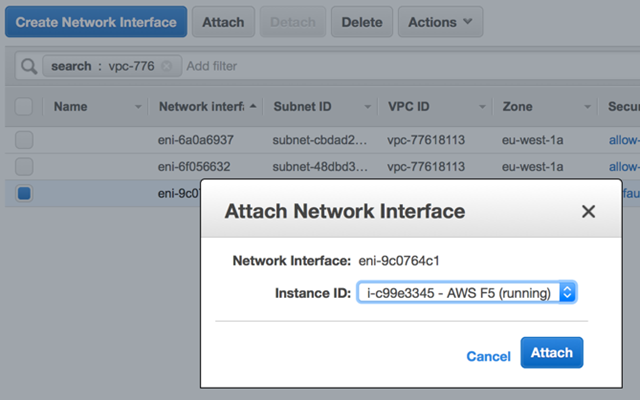
Once it’s created we need to attach it to the F5 instance – select the network and use the actions menu to attach the network interface to the F5 instance:
There should now be 3 networks assigned to the instance:

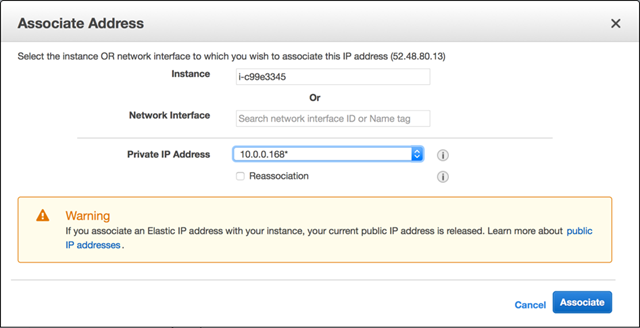
To make our management interface accessible to the internet we need to assign an elastic IP address to the interface. Select the Elastic IPs page from the EC2 console and click “Allocate New Address”, and confirm. Select the new address and from the Actions menu select “Associate Address”:
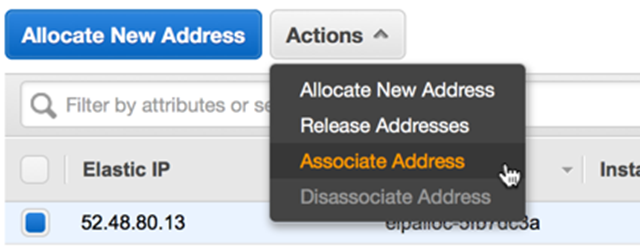
Select the F5 instance and associate it with the Management private IP address (if you followed my subnets, it’s the 10.0.0.x address) and click associate:
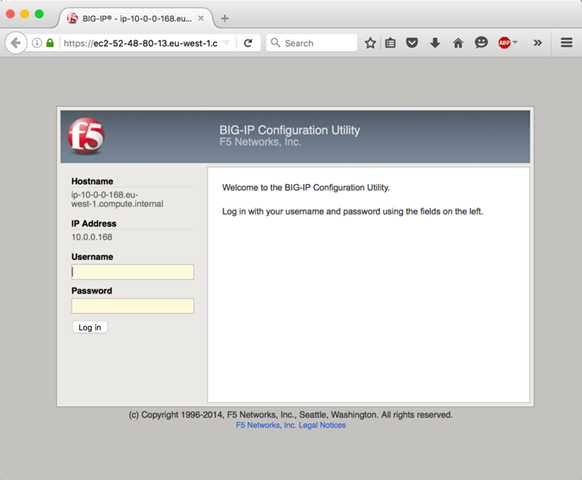
And that’s it – you can access the BIG-IP management website and begin to configure the instance:
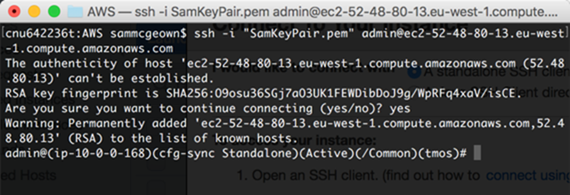
You can also SSH to the instance using the private key file we created earlier:
ssh –i “KeyPairName.pem” admin@