
Yesterday saw the release of NSX-T 2.1, with some new features and also some usability enhancements. You can check out the release notes here https://docs.vmware.com/en/VMware-NSX-T/2.1/rn/VMware-NSX-T-21-Release-Notes.html
As I’m mid-way through this blog series, I thought I’d stick in the upgrade as a little bonus!
Download the upgrade bundle#

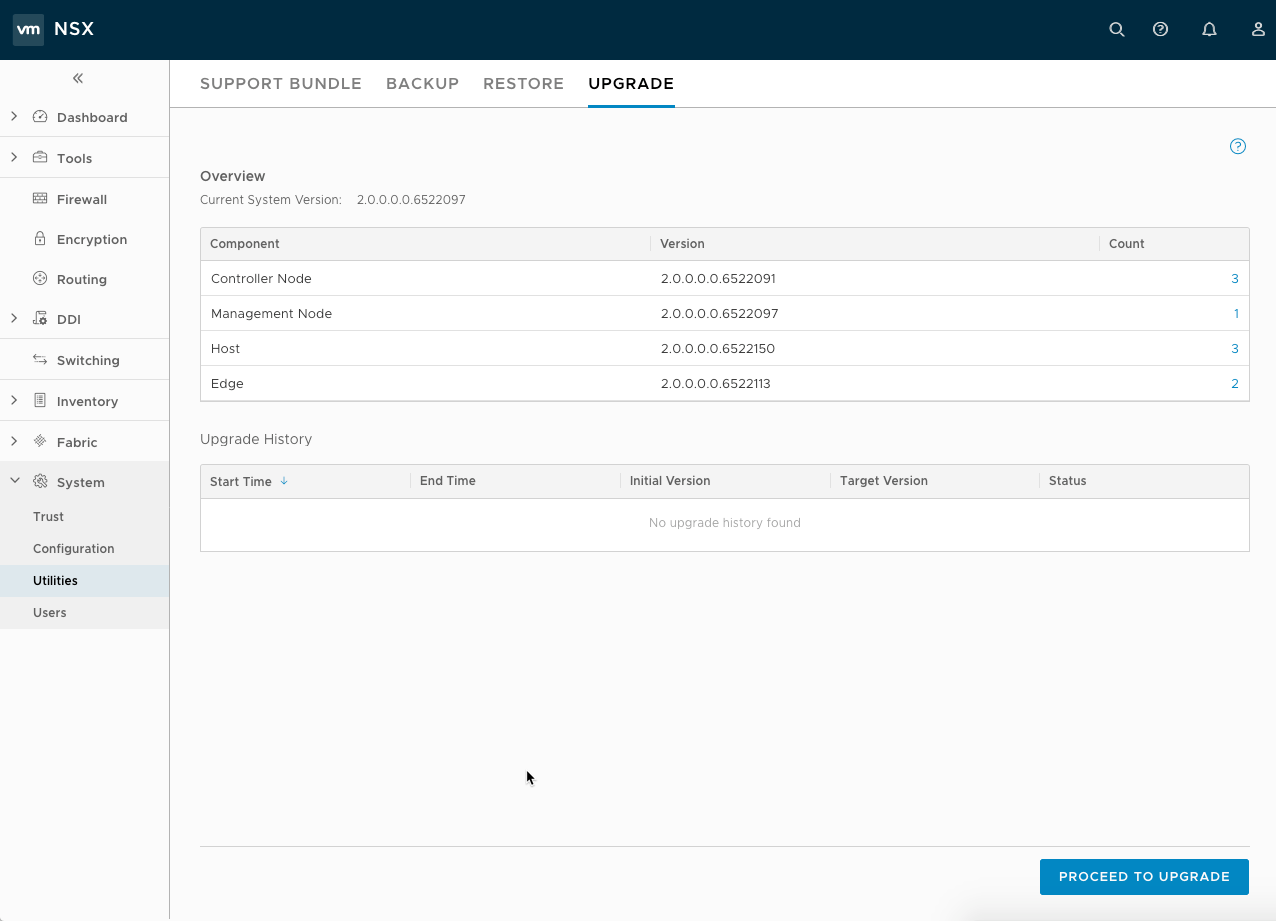
Validate the version and status of NSX-T components#
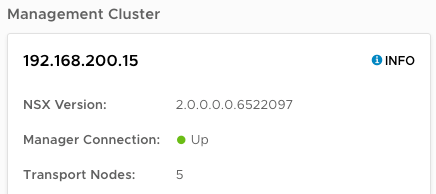
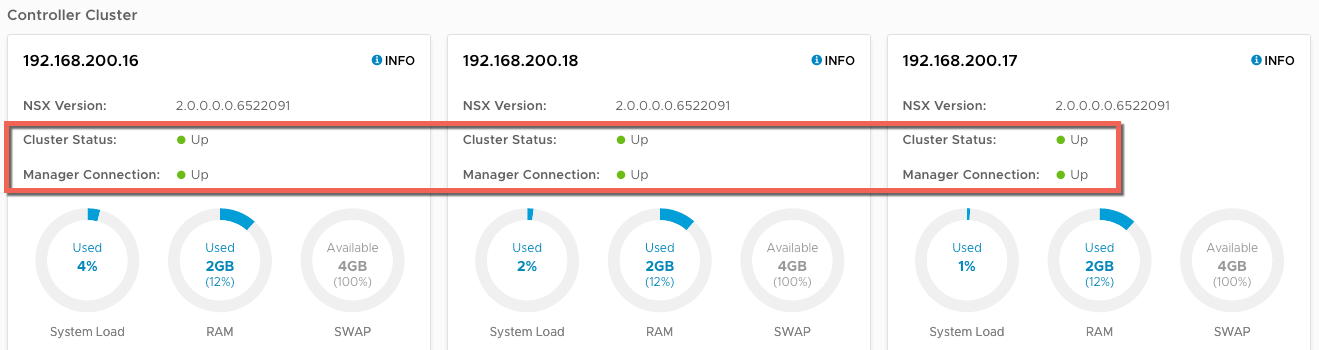
Check the Controller cluster status and Manager connections are up.
Validate the hosts are installed, and have a connection to the controller and manager.

Ensure the Edges

Finaly, check that the transport nodes are all in a “Success” state

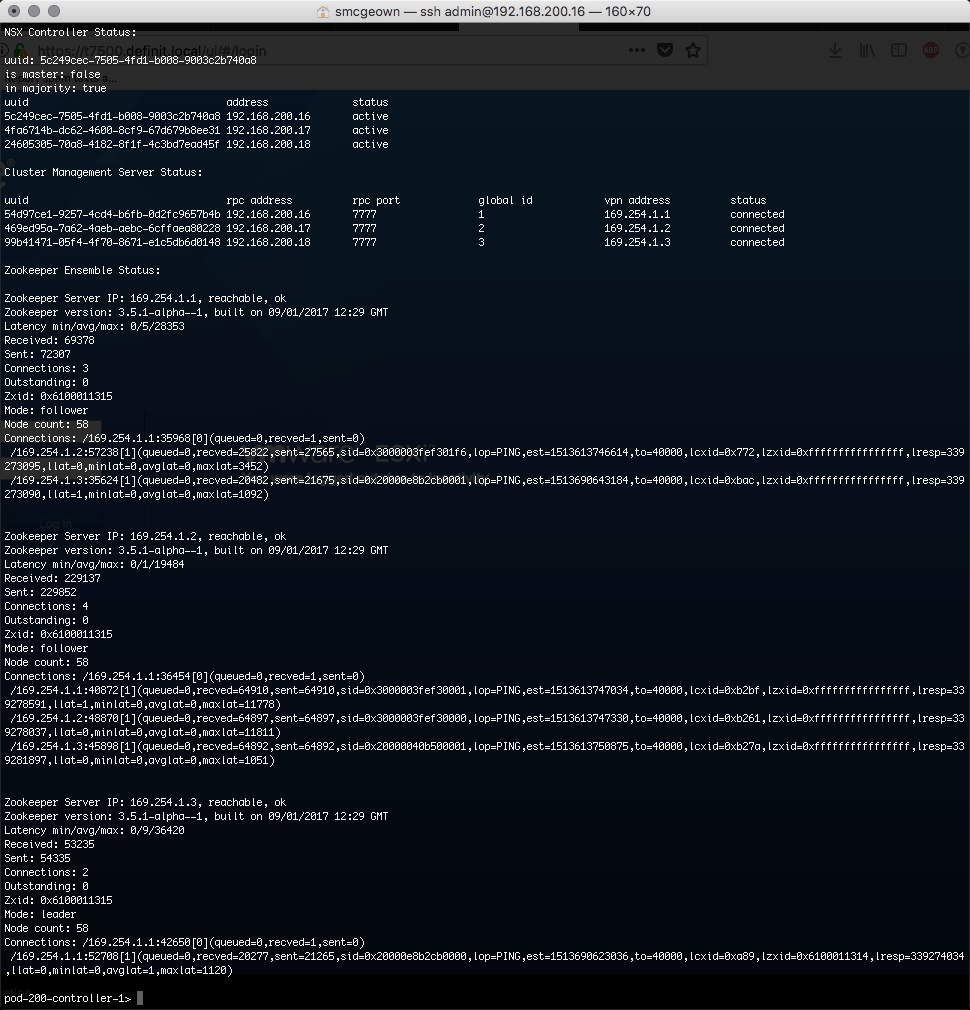
You can also validate the state of NSX-T via the command line
SSH to the controller and use “get control-cluster status verbose”
Uploading the NSX-T Upgrade bundle#
Navigate to System > Utilities > Upgrade, then click the “PROCEED TO UPGRADE” button
Select the upgrade .mub file and click “UPLOAD”
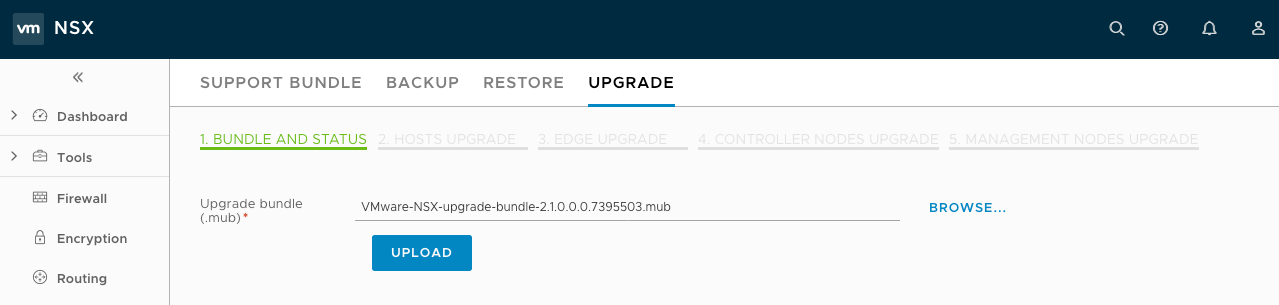
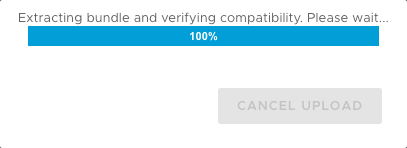
Since the upgrade bundle is fairly hefty (3.7GB) the upload will take a while, and once it’s uploaded it is extracted and verified, which again takes some time

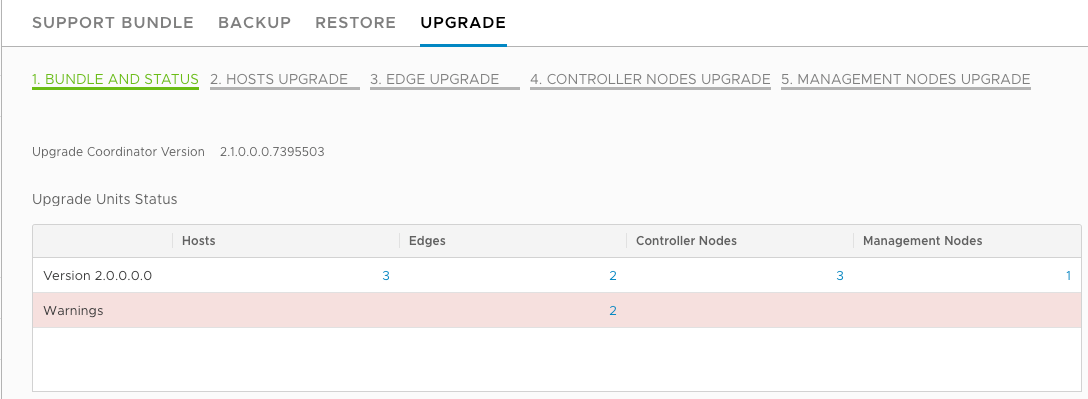
Once the package has uploaded, click to begin the upgrade. The upgrade coordinator will then check the install for any potential issues. In my environment there are two warnings for the Edges that the connectivity is degraded - this is because of the disconnected 4th VMNIC on my Edge VMs and is safe to ignore.
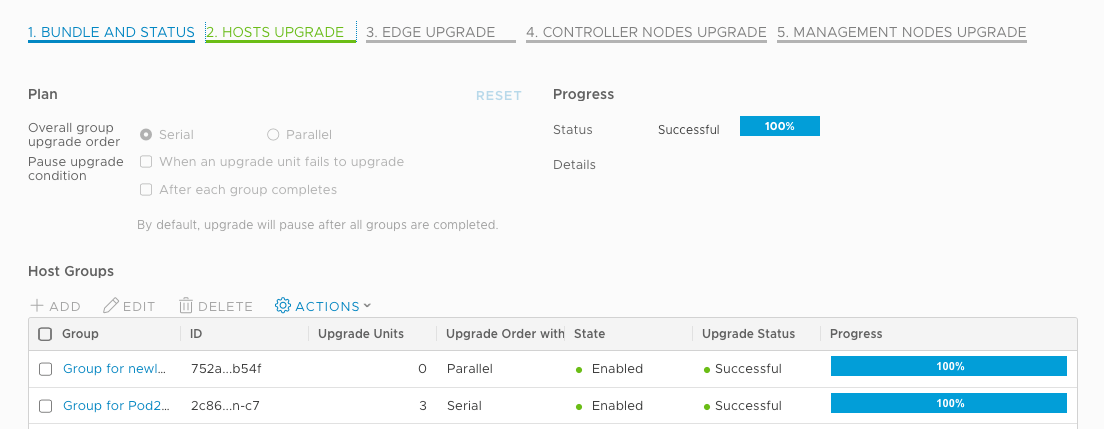
Click Next to view the Hosts Upgrade page. Here you can define the order and method of upgrade for each host, and define host groups to control the order of upgrade. I’ve gone with the defaults, serial (one at a time) upgrades over the parallel (up to 5 at once). All three hosts in this environment are in an automatic group for Pod200-Cluster-1. Click START to begin the upgrade, and the hosts will be put in maintenance mode, then upgraded and rebooted if necessary (a reboot shouldn’t be necessary!) Bear in mind you need to have DRS enabled and the VMs on the hosts must be able to vMotion off of the host being put in maintenance mode. Once the host has upgraded, and the MPA (Management Plane Agent) has reported back to the Manager, the Upgrade Coordinator will move on to the next host in the group.
Once the hosts are upgraded, click NEXT to move to the Edge Upgrade page
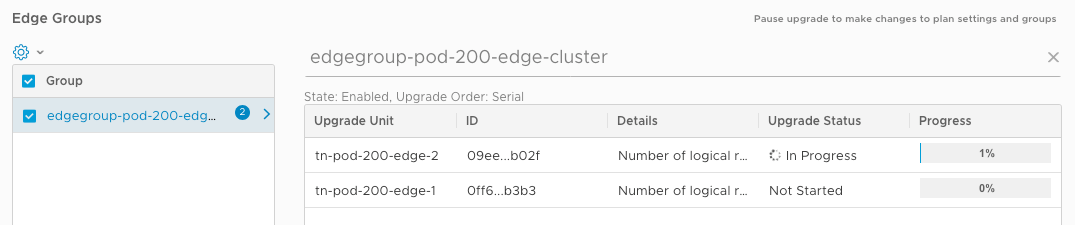
Edge Clusters can be upgraded in serial or parallel, but the Edges within are grouped by the Edge Clusters and upgraded serially to ensure connectivity is maintained. I have a single Edge Cluster with two Edge VMs, so this will be upgraded one Edge at a time. Click START to begin the upgrade, and select the Edge Cluster to view the status of the Edge VMs within the Cluster.
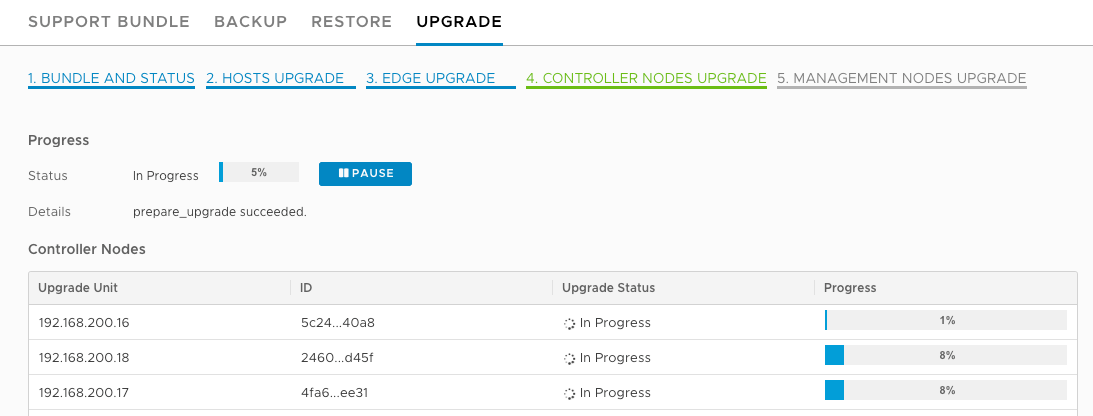
Once the Edge Cluster upgrades are complete, click NEXT to move to the Controllers. You can’t change the upgrade of the controllers, these are done in parallel by default. Click START to begin the upgrade - this step took by far the longest in my lab, so be patient!
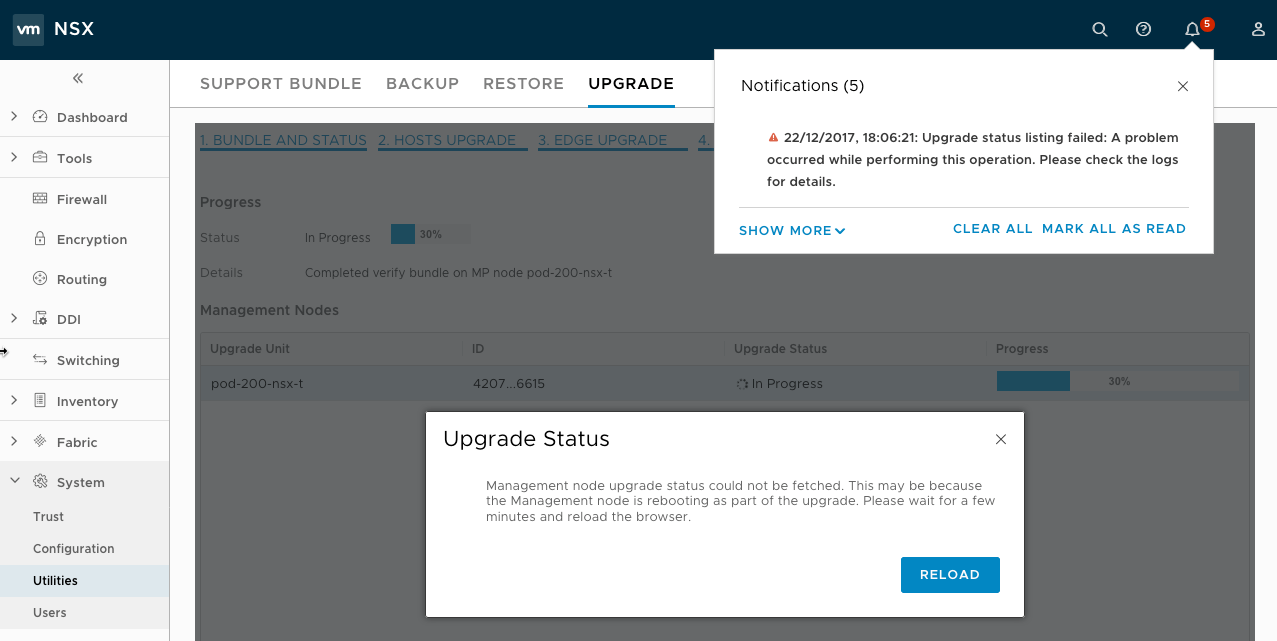
Once the upgrade has completed, click NEXT to move to the NSX Manager upgrade page. The NSX Manager will become unavailable about 2-4 minutes after you click START, and may take 10-15 minutes to become available again afterwards - don’t worry about errors that come up in the meantime!
Once the Manager upgrade has completed you can re-validate the installation as I did at the start, checking that we have all the green lights, and the versions have increased.
Over the next few posts I will be exploring some the new features introduced in 2.1