Lab Notes – vCloud Director 9.1 for Service Providers – Part 4: RabbitMQ Cluster Installation
- Lab Notes – vCloud Director 9.1 for Service Providers – Part 1: Pre-requisites
- Lab Notes – vCloud Director 9.1 for Service Providers – Part 4: RabbitMQ Cluster Installation
- Lab Notes – vCloud Director 9.1 for Service Providers – Part 3: NFS Server Installation
- Lab Notes – vCloud Director 9.1 for Service Providers – Part 5: vRealize Orchestrator Cluster
- Lab Notes – vCloud Director 9.1 for Service Providers – Part 2: PostgreSQL Installation
This series was originally going to be a more polished endeavour, but unfortunately time got in the way. A prod from James Kilby (@jameskilbynet) has convinced me to publish as is, as a series of lab notes. Maybe one day I’ll loop back and finish them…
RabbitMQ for vCloud Director
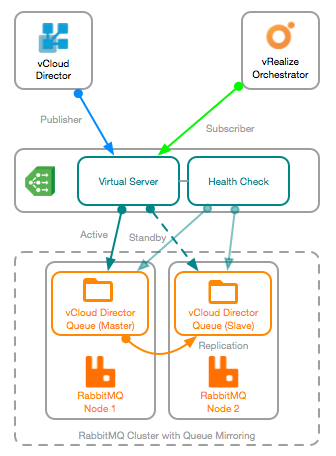
RabbitMQ High Availability and Load Balancing
The vCloud Architecture Toolkit states
RabbitMQ scales up to thousands of messages per second, which is much more than vCloud Director is able to publish. Therefore, there is no need to load balance RabbitMQ nodes for performance reasons.
Therefore, I am deploying RabbitMQ in cluster mode for high availability rather than scaling out resources. This means that I can use a RabbitMQ cluster with two nodes, configure replication for the vCloud Director queue, and then load balance the two nodes.
- When you configure a highly available queue, one node is elected the Master, and the other(s) become Slave(s)
- If you target a node with the Slave, RabbitMQ will route you to the queue on the Master node
- If the queue’s Master node becomes unavailable, a Slave node will be elected as Master
In order to provide a highly available RabbitMQ queue for vCloud Director extensibility, the load balancer will target the queue’s Master node and send traffic there. In the event that the node with the Master queue becomes unavailable, the load balancer will redirect traffic to the second node, which will have been elected as Master.
Both vCloud Director and vRealize Orchestrator will access the queue via the load balancer.
- vCloud Director will publish messages to the load balancer
- vRealize Orchestrator will subscribe as a consumer to the load balancer

Prerequisites
I’ve deployed two CentOS7 VMs from my standard template, and configured the pre-requisites as per my pre-requisites post. Updates, NTP, DNS and SELinux have all been configured.
RabbitMQ needs the exact same Erlang version installed on each node, the easiest way to do this is to enable the EPEL repository:
yum install epel-release -y
yum install erlang -y
vCloud Director 9.1 supports RabbitMQ 3.6, so locate and download the correct RPM from the GitHub release page
wget https://github.com/rabbitmq/rabbitmq-server/releases/download/rabbitmq_v3_6_16/rabbitmq-server-3.6.16-1.el7.noarch.rpm
To trust the downloaded package I need to import the RabbitMQ public signing certificate:
rpm -import https://www.rabbitmq.com/rabbitmq-signing-key-public.asc
Finally, lets open the host firewall ports required for RabbitMQ
firewall-cmd -zone=public -permanent -add-port=4369/tcp
firewall-cmd -zone=public -permanent -add-port=25672/tcp
firewall-cmd -zone=public -permanent -add-port=5671-5672/tcp
firewall-cmd -zone=public -permanent -add-port=15672/tcp
firewall-cmd -zone=public -permanent -add-port=61613-61614/tcp
firewall-cmd -zone=public -permanent -add-port=1883/tcp
firewall-cmd -zone=public -permanent -add-port=8883/tcp
firewall-cmd -reload
RabbitMQ Installation
The following steps should be completed on BOTH RabbitMQ nodes
Install the RabbitMQ RPM
yum install rabbitmq-server-3.6.16-1.el7.noarch.rpm -y
Enable, and start the RabbitMQ server:
systemctl enable rabbitmq-server
systemctl start rabbitmq-server
Enable the management interface and restart the server to take effect
rabbitmq-plugins enable rabbitmq_management
chown -R rabbitmq:rabbitmq /var/lib/rabbitmq/
systemctl restart rabbitmq-server
Finally, add an administrative user for vCloud Director:
sudo rabbitmqctl add_user vcloud ‘VMware1!’
sudo rabbitmqctl set_user_tags vcloud administrator
sudo rabbitmqctl set_permissions -p / vcloud “.*” “.*” “.*”
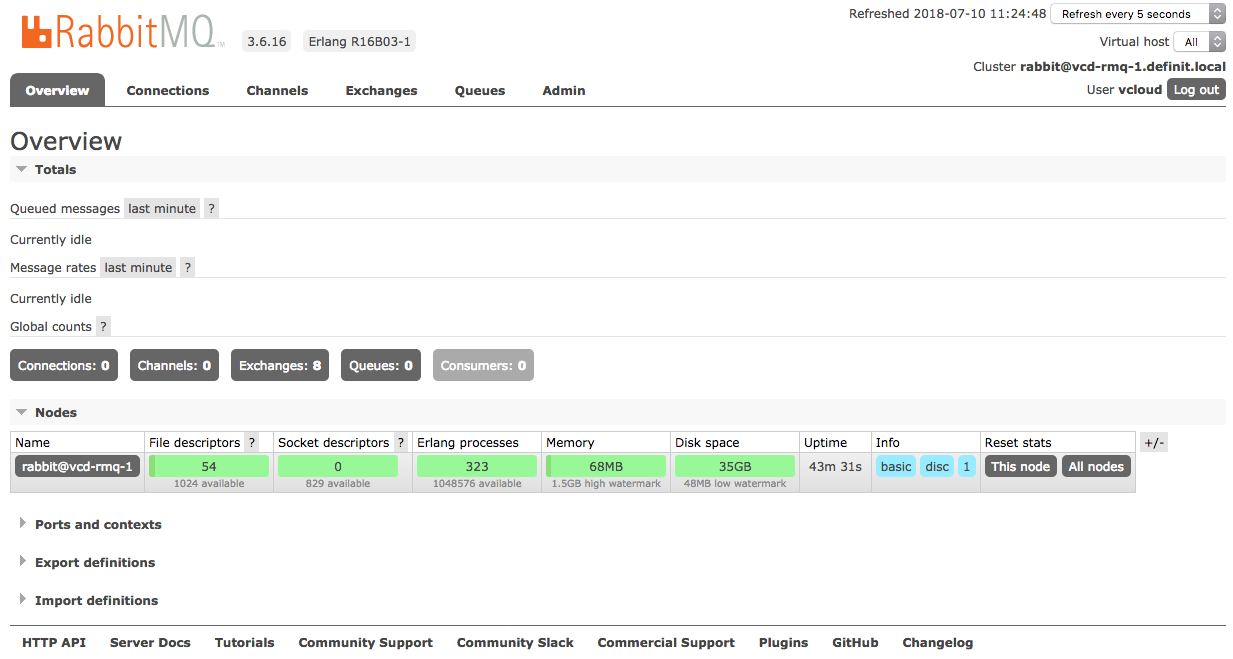
Validate that the RabbitMQ admin page is accessible on http://vcd-rmq-1.definit.local:15672

Clustering RabbitMQ nodes
Now I have two independent, stand-alone RabbitMQ nodes running, it’s time to cluster them. Firstly the Erlang cookie needs to be copied from the first node to the second, which allows them to join the same cluster.
IMPORTANT: Make sure both nodes can resolve each other using their short names (e.g. vcd-rmq-1 and vcd-rmq-2). If they cannot, create entries in the HOSTS file to ensure that they can.
On the first node only (vdc-rmq-1)
Read the Erlang cookie from the file:
cat /var/lib/rabbitmq/.erlang.cookie
Copy the cookie contents (e.g. “FAPNMJZLNOCUTWXTNJOG”) to the clipboard.
On the second node only (vcd-rmq-2)
Stop the RabbitMQ service:
Systemctl stop rabbitmq-server
Then replace the existing cookie file with the cookie from the first node
Echo “FAPNMJZLNOCUTWXTNJOG” > /var/lib/rabbitmq/.erlang.cookie
Start the RabbitMQ service
Systemctl start rabbitmq-server
Stop the RabbitMQ app and reset the configuration:
Rabbitmqctl stop_app
Rabbitmqctl reset
Join the second node to the first node:
rabbitmqctl join_cluster rabbit@vcd-rmq-1
Then start the RabbitMQ app:
rabbitmqctl start_app
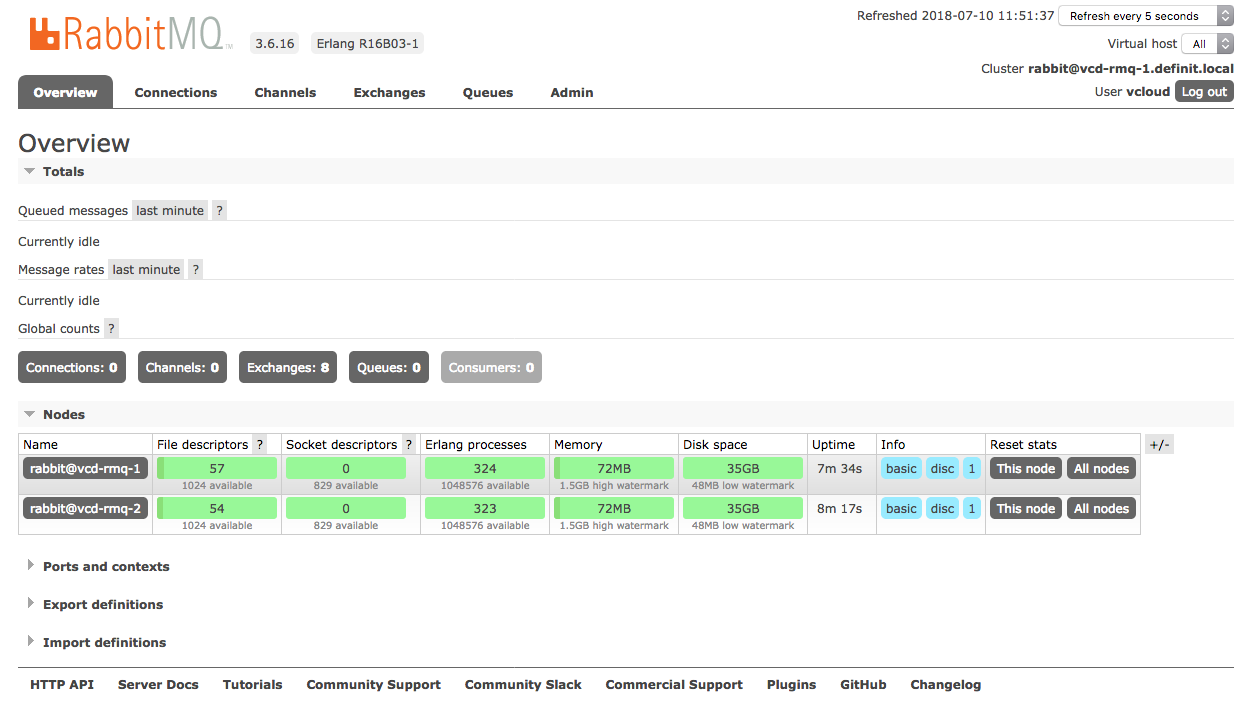
Validate the cluster status, using rabbitmqctl cluster_status, or by refreshing the management interface:

Configuring RabbitMQ for vCloud Director
Queue HA Policy
Now that the RabbitMQ nodes are clustered, we can configure the Queue mirroring with a HA policy. The below command creates a policy called “ha-all”, which applies to all queues (matching “”), then sets the ha-mode to “all” (replicate to all nodes in cluster) and the ha-sync-mode to “automatic” (if a new node joins, sync automatically). You can read more about RabbitMQ HA configuration here https://www.rabbitmq.com/ha.html
rabbitmqctl set_policy ha-all "" ‘{“ha-mode”:“all”,“ha-sync-mode”:“automatic”}’
Create a Topic Exchange
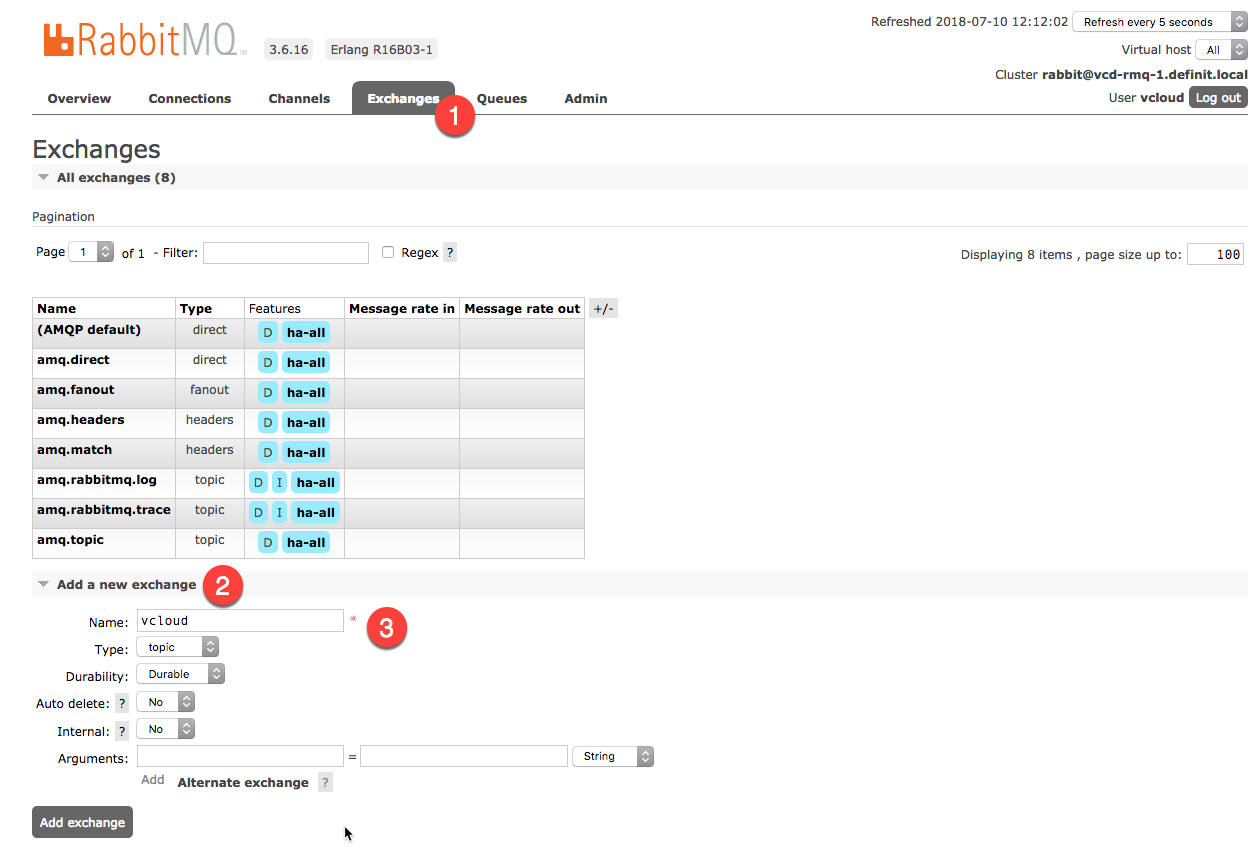
Using the RabbitMQ management interface, log on with the “vcloud” user created earlier and select the “Exchanges” tab. Expand the “Add a new exchange” box and enter a name for the exchange. The remaining settings can be left at default. Once the new Exchange has been created, you can see that the “ha-all” policy has applied to it.

Configuring the RabbitMQ Load Balancer
The final configuration step is to load balance the two RabbitMQ nodes in the cluster - as described in the opening of this post, this will steer the publisher (vCloud Director) and subscriber (vRealize Orchestrator) to the node with the active queue.
I will be configuring an NSX-T load balancer, on the Tier-1 router that all the vCloud Director components are connected to. However the basic configuration should apply across most load balancer vendors. The load balancer should direct all traffic to vcd-rmq-1, unless the health check API does not return the expected status.
Virtual Server
10.12.0.4 (vcd-rmq.definit.local)
Layer 4 - TCP 5672
Server Pool
Round Robin (though in reality, it’s active/standby)
10.12.0.130 (vcd-rmq-1)
TCP 5672
Weight 1
Enabled
10.12.0.131 (vcd-rmq-2)
TCP 5672
Weight 1
Enabled
Backup Member (used if the other member goes down)
Health Check
Request URL /api/healthchecks/node
HTTP 15672
Header (basic authorisation header)
Response status: 200
Response body: {“status”:”ok”}
Next Steps
Later, once the vCloud Director installation is completed, I will configured vCloud Director to use notifications to this RabbitMQ cluster.

