
Most vSphere admins are more than comfortable with using Update Manager to download patches and update their environment, but few that I talk to actually know a huge amount about the Update Mangaer Download Service (UMDS). UMDS is tool you can install to download patches (and third party VIBs - I’ll get to that) for Update Manager and it’s useful for environments that don’t have access to the internet, or air-gapped, and also for environments with multiple vCenter Servers where you don’t necessarily want to download the same patch on every server. You can control which patches you download (for example, limiting to ESXi 6.7+ only) and you can add third party Vendor repositories (e.g. Dell or HPE).
I’m going to install UMDS on a Linux VM, download the VMware, HPE and Dell patches and then publish those internally on an SSL secured site using NGINX. The high level process is:
- Deploy the UMDS server
- Install UMDS
- Configure UMDS
- Install NGINX
- Configure vCenter
Deploy the UMDS server#
I’ve deployed a CentOS7 VM from a template and added a big data drive for the UMDS data (this makes it easier to extend later if I need to). Check out the currently supported Linux operating systems for UMDS for 6.5 and 6.7.
Note: for vSphere 6.7u1, VMware dropped the requirement for a PostgreSQL database
- Format the data drive and mount to /umds
- Install PostgreSQL 9.4
yum install https://download.postgresql.org/pub/repos/yum/9.4/redhat/rhel-7-x86_64/pgdg-centos94-9.4-3.noarch.rpm
yum install postgresql94 postgresql94-server postgresql94-odbc
/usr/pgsql-9.4/bin/postgresql94-setup initdb
systemctl enable postgresql-9.4
systemctl start postgresql-9.4- Create a UMDS user and database
su - postgres
createdb <database_name>;
createuser -d -e -r <database_username>; -P
Pwd: <database_password>;- Edit
/var/lib/pgsql/9.4/data/pg_hba.confand change local, IPv4 and IPv6 to use md5 authentication (not ideal, but it works)
# TYPE  DATABASE        USER            ADDRESS                 METHOD
# "local" is for Unix domain socket connections only
local   all             all                                     md5
# IPv4 local connections:
host    all             all             127.0.0.1/32            md5
# IPv6 local connections:
host    all             all             ::1/128                 md5
# Allow replication connections from localhost, by a user with the
# replication privilege.
#local   replication     postgres                                peer
#host    replication     postgres        127.0.0.1/32            ident
#host replication postgres ::1/128 ident- Edit
/etc/odbcinst.inito use the ODBC driver
[PostgreSQL]
Description=PostgreSQL ODBC driver (Unicode version)
Driver64=/usr/pgsql-9.4/lib/psqlodbcw.so
Setup64=/usr/lib64/libodbcpsqlS.so
Debug=0
CommLog=1
UsageCount=1- Create the ODBC DSN
/etc/odbc.ini
[<dsn_name>]
Driver = PostgreSQL
DSN = <dsn_name>
ServerName = localhost
PortNumber = 5432
Server = localhost
Port = 5432
UserID = <database_username>;
User = <database_username>;
Database = <database_name>;- Validate the connection using
isql -v UMDS_DSN <database_username> <database_password>;
Install UMDS#
Next, mount the vCenter Server Appliance ISO file, copy the UMDS installer tar.gz file into the /umds folder and extract the installer. When this is complete there should be a vmware-umds-distrib folder.
mkdir /mnt/cdrom
mount /dev/cdrom /mnt/cdrom
cp /mnt/cdrom/umds/VMware-UMDS-6.7.0-8169861.tar.gz /umds/VMware-UMDS-6.7.0-8169861.tar.gz
cd /umds
tar xvzf VMware-UMDS-6.7.0-8169861.tar.gz
umount /mnt/cdrom
Run the UMDS installation script /umds/vmware-umds-distrib/vmware-install.pl
- Accept the EULA
- Enter the install location (/umds/vmware-umds)
- Configure proxy (you can configure it later if required)
- Enter the patch location (/umds/vmware-umds-patches)
- Configure database connection using <dsn_name>, <database_username> and <database_password>
Configure UMDS#
- View the current configuration
/umds/vmware-umds/bin/vmware-umds -G- Disable older patches (I just want 6.7)
/umds/vmware-umds/bin/vmware-umds -S -d embeddedEsx-6.0.0 embeddedEsx-6.5.0 embeddedEsx-6.6.1 embeddedEsx-6.6.2 embeddedEsx-6.6.3- Add the Dell and HPE repositories
/umds/vmware-umds/bin/vmware-umds -S --add-url https://vmwaredepot.dell.com/index.xml --url-type HOST
/umds/vmware-umds/bin/vmware-umds -S --add-url https://vibsdepot.hpe.com/index.xml --url-type HOST- Fix the SSL errors (use the local lib curl binary)
mv /usr/local/vmware-umds/lib/libcurl.so.4 /usr/local/vmware-umds/lib/libcurl.so.4.backup
ln -s /usr/lib64/libcurl.so.4 /usr/local/vmware-umds/lib/libcurl.so.4- Download the updates
/umds/vmware-umds/bin/vmware-umds -DInstall NGINX#
- Install and start nginx
yum install epel-release
yum install nginx
sudo systemctl start nginx
sudo systemctl enable nginx- Configure the firewall for HTTPS
firewall-cmd --permanent --add-port=443/tcp
firewall-cmd --reload- Generate SSL certificates
mkdir /etc/nginx/ssl-certs/
openssl req -x509 -nodes -days 365 -newkey rsa:2048 -keyout /etc/nginx/ssl-certs/umds.key -out /etc/nginx/ssl-certs/umds.crt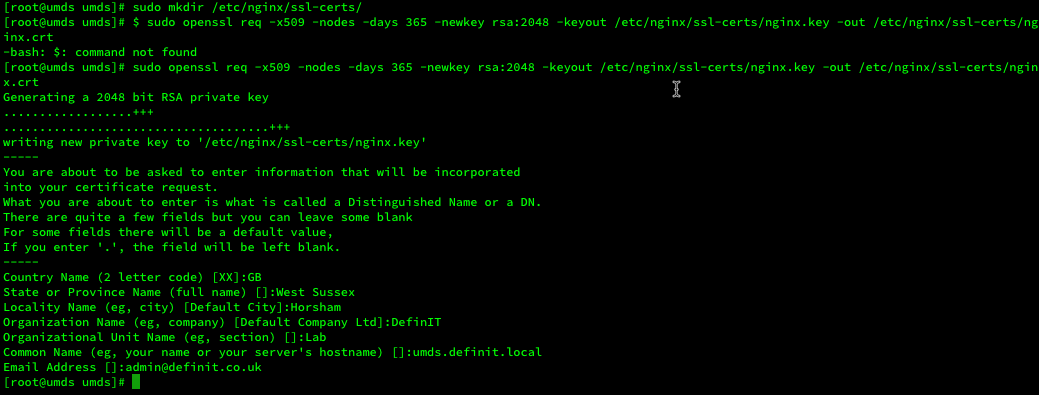
- Create an NGINX config file for UMDS -
/etc/nginx/conf.d/umds.conf
server {
    listen 443 ssl;ssl on;
    ssl_certificate /etc/nginx/ssl-certs/umds.crt;
    ssl_trusted_certificate /etc/nginx/ssl-certs/umds.crt;
    ssl_certificate_key /etc/nginx/ssl-certs/umds.key;

    server_name umds.definit.local;
    root /umds/vmware-umds-patches;
    index index.html;
    location / {
        autoindex on;
        try_files $uri $uri/ =404;
    }
}- Restart NGINX -
systemctl restart nginx
Configure vCenter Update Manager#
- Add the certificate to vCenter trust - log in to vCenter and navigate to Administration > Certificate Management
- Log in as [email protected]
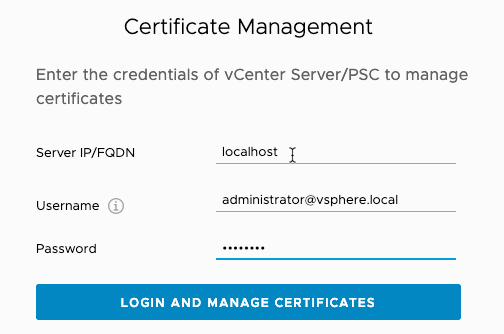
- Under Trusted Root Certificates click ADD and upload the generated umds.crt
- Navigate to Update Manager > Settings > Patch Setup and click Change Download Source - enter the UMDS web server

- Navigate to Patch Downloads > DOWNLOAD NOW