Sam’s Lab
[Updated January 2015]
Requirements
- Quiet – the lab sits in my office and so I need a quiet solution
- Heat/power – again, sat in my office I can’t be slowly roasted by the thermal output of the hosts, power is purely a cost thing but is directly related to the heat issue.
- Flexible – I need to be able to work on a huge variety of software, so flexibility is key.
Hosts
Management
 While it’s not strictly necessary to have a management cluster (or host), I like to emulate a production environment as much as possible. I also like to keep services like Active Directory, vCenter and other “infrastructure” functions away from the “workload” cluster – especially with NSX involved, where a mistake could isolate those functions. It also allows for full management of the workload cluster without downtime on DNS for example.
- Intel NUC – Core i3 3217U 1.8GHz
- 16GB RAM
- 32GB mSATA SSD
- 8GB USB (boot device)
The Intel NUC is one of the earlier models, and it’s been a rock solid part of my home lab for a few years now (originally my entire lab!). Alex Galbraith (@alexgalbraith) is a big fan of the NUCs and has lots of resources on his site for setting them up. Also a great tip about sitting the NUC on it’s side to reduce the very high running temperature.
The NUC is limited by a single NIC, a single mSATA drive (later models have space more) and 16GB RAM, which is why I only have one. There are some hardware hacks to add more NICs, but for me they spoil the beauty of the NUC – that said, if Intel release a dual-NIC NUC (fun to say that out loud) with 32GB RAM, I’d be all over it like a rash 🙂
Workload
 I initially started with a single HP N54L Microserver for my “workload” cluster, and slowly added two more so that I now have a cluster of 3.
- HP G7 N54L
- 16GB (2*8GB) Crucial 1333MHz DDR3 ECC CL9 DIMM
- 2 * Intel Gigabit CT Desktop Adapter
- 40GB Intel 320 Series SSD
- 1TB Western Digital Green
- 2.5" to 3.5" disk adapters
The N54Ls are good little lab servers and definitely fit the bill in terms of power consumption (150W max) and noise – they’re very quiet. The processors are not great – just a single dual core AMD Turion II Neo running at 2.2GHz – but it’s plenty to run lab work, I typically have 5-6 VMs running per host and run out of RAM before CPU gets to be a problem. RAM is a limitation, the N54L doesn’t officially support 16GB so make sure you order RAM people that definitely works!
The addition of the two Intel gigabit adaptors means I can run a much more flexible setup for networking and storage, with three gigabit links in total. The adapters themselves are cheap desktop ones so I don’t expect huge performance from them – they do support jumbo frames though.
I use the 40GB SSD drive to run PernixData FVP 2.0 and accelerate my iSCSI storage…but more on that in the storage section. The 1TB local disks are used for testing (e.g. VSAN) and migrations, they are just disks I had lying around.
Storage
 Problems with storage have plagued my lab from day one, and I have always tried to maximise the capacity available for the smallest possible price. I have struggled to get performance, lost data more than once and generally been frustrated – until I purchased my Synology. You really do get what you pay for, and if you can stretch your budget, this is where to spend it!
Shared Storage
- Synology DS412+
- 4 * WD Green Western Digital WD20EADS 2TB Internal 3.5" Hard Drive
The Synology has been a rock solid storage device for me since I powered it on. The four 2TB WD disks are configured in a RAID 10 disk group, and I’ve created three 2TB thin provisioned iSCSI LUNs to be able to replicate datastore clustering. VAAI support is a massive bonus when it comes to the Synology, as are the dual gigabit NICs.
I have configured iSCSI multi-pathing using two separate VLANs and two iSCSI targets on the Synology – this allows me to spread the I/O over both NICs effectively. You can create LACP teaming/bonded interfaces but I found this setup worked best for me.
PernixData FVP*
![]() I was fortunate enough to get both PernixPro and PernixPrime this year, which allowed me access to an NFR copy of PernixData FVP 2.0. If you’re not familiar with FVP, it is “a 100% software solution that clusters server flash and RAM to create a low latency I/O acceleration tier for any shared storage environment.”
I was fortunate enough to get both PernixPro and PernixPrime this year, which allowed me access to an NFR copy of PernixData FVP 2.0. If you’re not familiar with FVP, it is “a 100% software solution that clusters server flash and RAM to create a low latency I/O acceleration tier for any shared storage environment.”
I use FVP to accelerate the iSCSI I/O using the Intel SSDs in my workload cluster – and it works like a charm. It’s one of those bits of software that you can install very, very quickly and makes a huge difference to the responsiveness of my lab. Once it’s up and running, I more or less forget about it – it just works.
*Disclosure: Although I am both PernixPro and PernixPrime, and I work for a Pernix partner, my involvement with them has stretched back to the early betas before any of that – and I have been an avid fan and supporter since then! This is my personal opinion and experience and is not influenced by any of the above programs, other than receiving the NFR license there is no reward for my participation, and this post is in no way sponsored by Pernix.
Networking
Networking is an area I spend a lot of time on, and so I wanted the kit that I got for the lab to be as capable and as flexible as possible. It needed to be gigabit, and it needed to be capable of providing L3 services – Cisco has long been my preferred networking choice. I’ve also included my wireless internet router below because it does provide some routing and other functionality, and it’s a little bit custom.
Switch
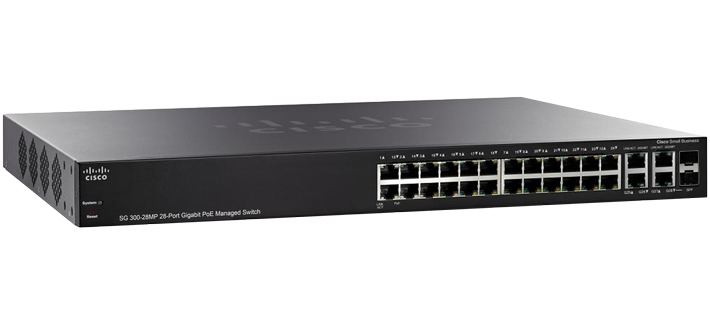 Cisco SG300-20 20 Port Gigabit Managed Switch
For networking I selected the very highly rated Cisco SG300 series switch, which is a very capable little switch and offers enough ports for all my servers and storage. I run the switch in layer 3 mode because I tend to do a lot of testing and development and end up creating a destroying networks regularly – although this has been lessened recently with NSX and network virtualisation.
Something that does bug me with this switch a little is the “security feature” which drops jumbo ICMP frames – even with the security feature turned off! This makes troubleshooting VXLAN or jumbo storage packets a little difficult.
Wireless Internet Router
 TPLink Archer C7
- OpenWRT
The Archer C7 is a pretty capable router in and of itself, however once you install OpenWRT on it, it becomes a much more powerful and customisable beast. I may expand on the setup of this later, but suffice to say the performance improvement on WiFi alone was more than enough to convince me to move to OpenWRT.
The Lab!
